




Rubber body seals
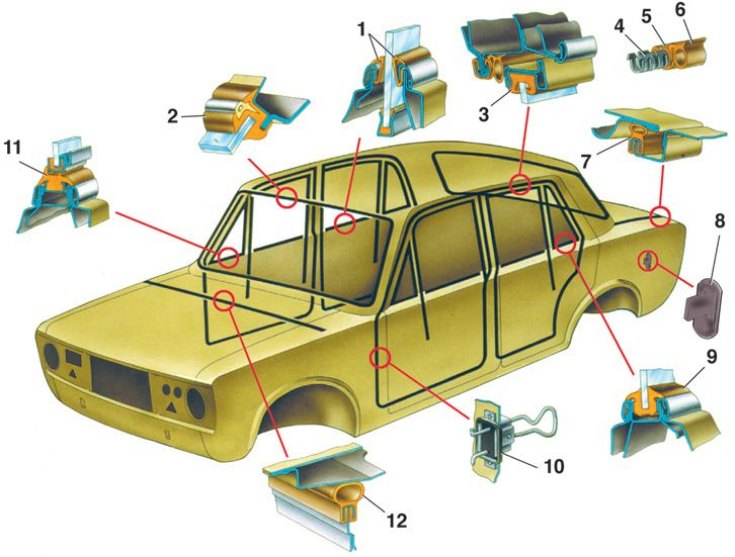
1 – lower door glass seal; 2 – windshield and rear window; 3 - drop glass; 4 – seal frame; 5 – seal edge; 6 – door opening seal; 7 – trunk lids; 8 – bumper brackets; 9 – fixed door glass; 10 – door opening limiter gasket; 11 – rotary glass; 12 – hood
Places of application of non-drying sealing mastic
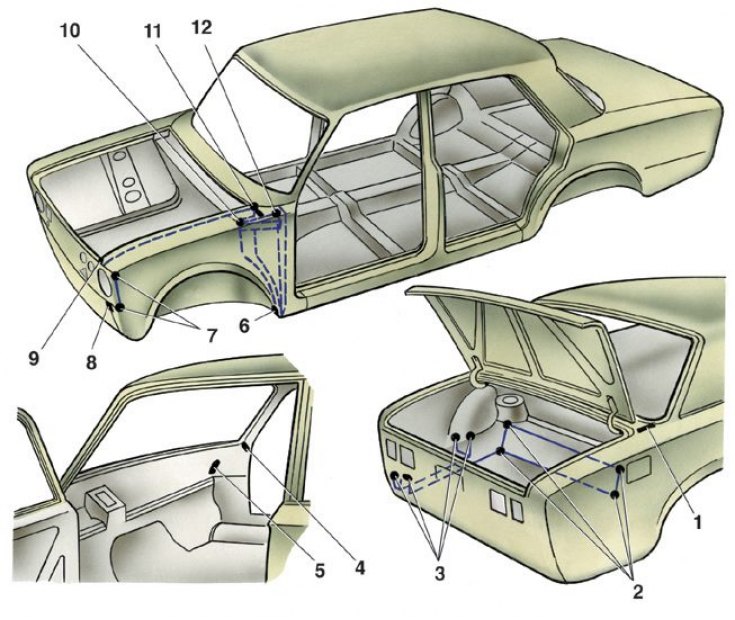
1 – joints of the rear wings with the rear panel (inside the body); 2 – corners of the joints of the trunk floor with the rear floor; 3 – joint of floors under spare wheel (fuel tank) with rear panel, side members and rear wings; 4 – joints of the bases of the inclined part of the front pillars; 5 – joints of the front side panels with the upper reinforcements of the front shield; 6 – joints of the front shield with the front side panels; 7 – joints of front wings with wing connectors; 8 – joints of the wing connector with mudguards, 9 – joints of the wing reinforcements with the upper front crossmember; 10 – joints in the corners of the lower front panel; 11 – corners and joints of the windshield frame panel with the fenders and gutters; 12 – joints of the reinforcements with the front pillars of the sidewalls
Sealing is ensured by the use of various rubber seals, sealing mastics, rubber plugs for process holes and careful adjustment of mating parts.
When removing or installing seals with metal frames, do not allow the frame to become crushed or corrugations to form on the seals.
The contact spot welds used to weld the stamped body parts do not provide a tight connection. They are subject to intense corrosion, especially at the bends of sheets with small rounding radii and in places of metal overstress.
The welded seams are sealed with D-4A plastisol to protect them from moisture and dirt.
When replacing individual body parts, after welding and applying primer, coat the seams on both sides with D-4A plastisol. Apply non-drying sealing mastic 51-G-7 to the corner joints and gaps shown in the figure.