
- keys "on 10", "at 19"
- ball joint pin puller
- pliers
- screwdriver
Remove the corresponding wheel.
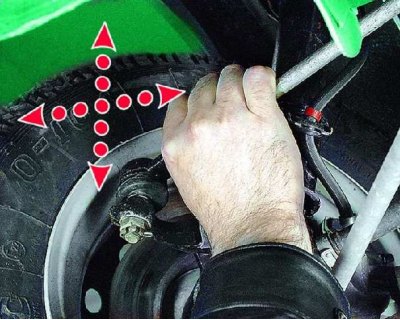
If the free play of the steering wheel is increased or the force required to turn it is significantly increased, check the axial and radial clearances in the ball joints of the steering rods. If free play is felt in the ball joint or corrosion occurs on the ball stud, replace the ball joint with tip assembly.
Be sure to replace the torn ball joint boot. Otherwise, dirt and water that get into the hinge will quickly disable it. You can replace the cover without removing the tip from the rod.
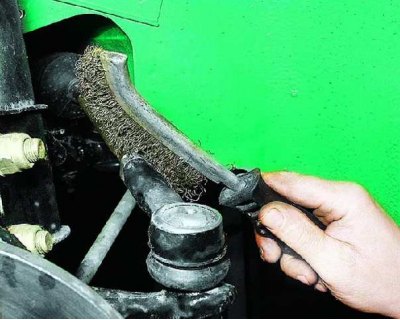
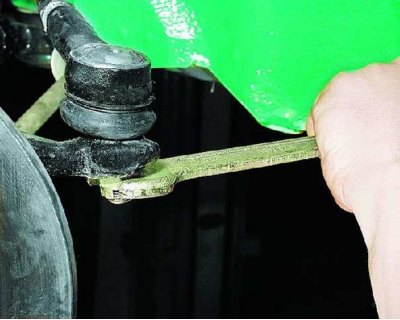
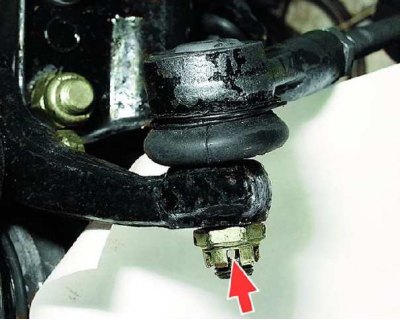
1. Clean the outer tie-rod end locknut and the tie-rod end-to-swivel-arm nut.
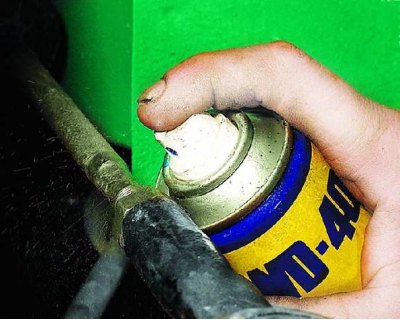
2. To loosen the nut and locknut more easily, apply WD-40 to the threaded connections and wait a while.
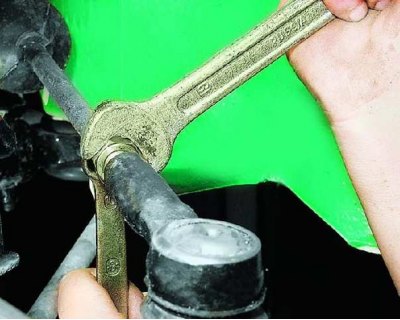
3. Loosen the tip locknut, holding the tie rod by the hexagon from turning with the second wrench.
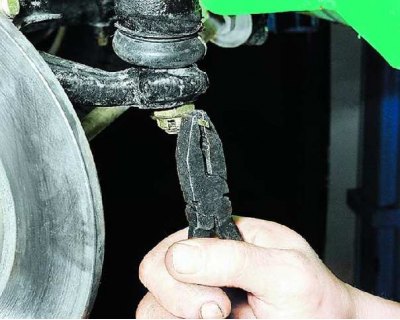
4. Remove the pin.
5. Loosen the nut.
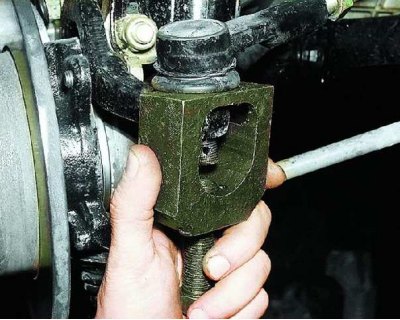
6. Install the puller and press the ball joint pin out of the pivot arm.

7. Disconnect the tie rod from the swing arm.
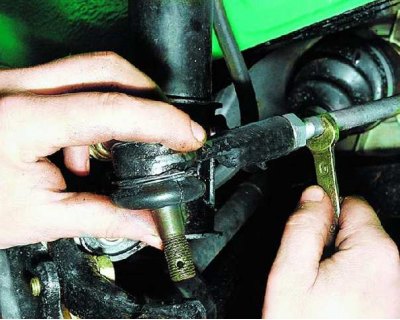
8. Loosen the tip by holding the hex rod and counting the number of turns. This will help when installing the tip to approximately maintain the convergence of the wheels.
9. Install the tip in the reverse order of removal, screwing it onto the rod by the previously calculated number of turns. After tightening the handpiece finger nut to the required torque, tighten it until the nearest cotter pin slot in the nut is aligned. Check and, if necessary, adjust the wheel alignment.