




Warning: Oil and dirt on the belt will reduce its service life.
To complete the work you will need: calipers and a household spring balance (for 16-valve engines only), timing belt tensioner key (see "Tools, accessories and operating materials").
Warning! Checking and adjusting the belt tension should be performed on a cool engine.
1. Prepare the car for work (see "Preparing the car for maintenance and repair").
2. On engines 2112, 21124 and 21114 remove the decorative engine cover (see "Engine trim - removal and installation").
3. Remove the front cover engines 2112, 2111, 21114 or the top of the front cover engine 21124 (cm. "Timing Belt - Replacement").
4. Remove the front right wheel (see "Wheel - replacement") and place the car on a secure stand.
5. Remove the right mudguard from the engine compartment (see "Engine compartment mudguards - removal and installation").
6. Rotate the crankshaft with a socket wrench at 17 or 19 mm, we inspect the belt.
Recommendation: When checking the timing belt, you can rotate the crankshaft in the following way: Engage fourth gear and lift the right front side of the car with a jack (see "Preparing the car for maintenance and repair"), rotate the right front wheel clockwise. This will rotate the engine crankshaft.
Testing on 16-valve engines
1. Hook the spring balance hook onto the socket wrench extension handle. Secure the spring balance hook to the extension using insulating tape or scotch tape.
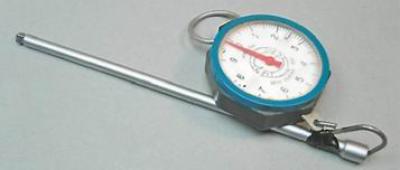
2. We check the belt tension in the middle part of the branch between the camshaft pulleys. We apply the edge of the ruler to the pulleys. Using an extension, we press on the belt with a force of 10 kgf, we measure its deflection, which should be 5.4 mm.
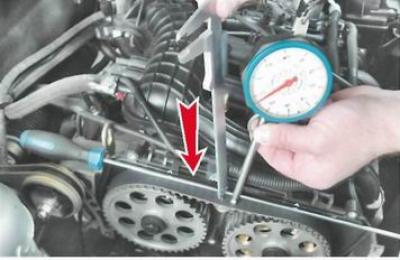
If the belt deflection is greater than specified, tighten the belt; if the belt is overtightened, loosen its tension.
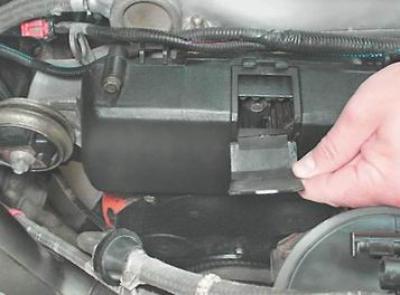
Comment.To check the condition and tension of the belt on the 2112 engine, it is enough to remove the plug from the front cover. In this case, the belt deflection can be measured from the edge of the front cover. It is necessary to measure the distance from the edge of the cover to the timing belt beforehand and take this dimension into account when taking measurements.
Testing on 8-valve engines
Using two fingers, try to turn the belt 90° in the area between the crankshaft and camshaft pulleys, applying a force of 15-20 N·m (15-2.0 kg cm).
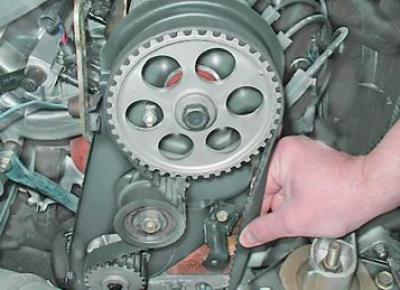
If the force applied is not enough to turn the belt to the required angle, the belt is overtightened; if the belt can be turned to a greater angle, it is not tight enough.
Tension adjustment
1. Key by 17 mm loosen the tension roller mounting nut.
2. Using a special key, turn the roller to adjust the belt tension. Without releasing the roller, tighten the nut that secures it (the operation is shown on the example of engine 21124, on other engines it is performed similarly).
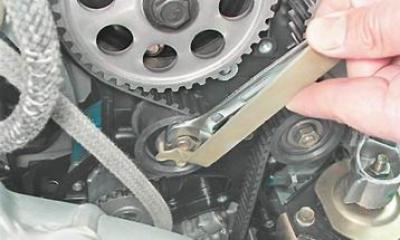
3. Turn the engine crankshaft 2 revolutions and check the belt tension (see above). Repeat the adjustment if necessary.
4. Finally tighten the roller mounting nut to a torque of 33.23-41.16 N·m (3.4-4.2 kg cm)
Warning! Over-tensioning the belt will shorten its service life and may cause failure of the coolant pump bearings, tensioner and guide rollers.
5. Install the parts in the reverse order of removal.