
Removal and installation of doors
Open the door to the stop and disconnect the door opening limiter from the rack with pliers. While holding the door, unscrew the screws securing the hinges to the body pillar with an impact screwdriver and remove the door. When installing the door, before the final tightening of the fastening screws, the gaps are adjusted by offset relative to the contours of the hinges (see fig. 178) between door and body.
Disassembly and assembly of doors
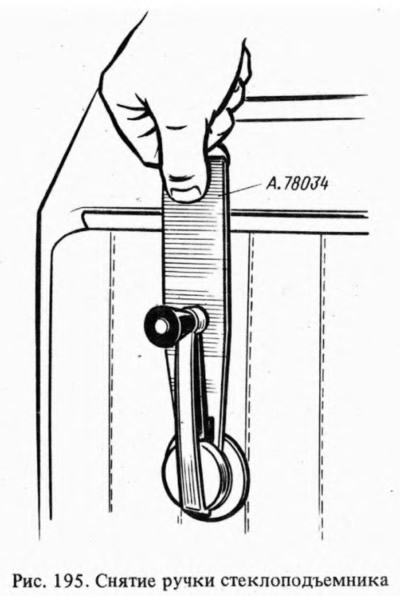
When disassembling the front doors, unscrew the screws securing the armrest and remove it. Using a screwdriver, remove the interior door handle trim. Press socket 6 (see fig. 193), take out the spring 7 with the help of a special device and remove the handle (pic. 195) window regulator. Overcoming the resistance of spring plastic holders, remove the door trim. When the sliding window is in the upper position, the screws securing the rear groove are unscrewed, the groove is removed and the glass is lowered down. After loosening the nut of the tension roller of the power window, disconnect the cable from the glass holder, remove it from the rollers, lower the glass down and deflecting the lower edge towards itself, remove the glass from the door through the lower opening. Unscrew the fastening nuts and take out the window regulator. Remove the seals of the sliding window, unscrew the screws securing the frame of the swivel window and remove it as an assembly. Turn out button 7 (see fig. 194) the lock lock, the screws securing the bracket of the inner handle, the screws securing the lock and remove the lock together with the rods, having previously disconnected the rod 15 from the lock switch leash. Unscrew the nuts and remove the outer door handle. Unscrew the bolts and take out the door opening limiter. Remove the lower seals of the sliding window together with the holders.
Assemble the door in reverse order. When assembling, putting on a cable 10 (see fig. 193) on the rollers and fixing the window regulator, make sure that the coils of the cable on the drum do not overlap each other. To properly fix the sliding glass, install it on the stop, rotate the window regulator handle to the position corresponding to the lower position of the glass, and then fix the cable with pressure plate 2. With the glass fully raised, the window regulator handle is placed at an angle of 45°from the vertical axis forward. Before installing the door upholstery, check the condition of the plastic holders.
When disassembling and assembling the rear doors to remove the fixed glass, first remove the guide grooves of the sliding glass, release the cable and lower the glass down. After removing the fixed glass, the sliding glass is removed through the upper opening.
Door lock adjustment
Before adjustment, outline the contours of the lock retainer on the body pillar. If the door closes too tightly, loosen the latch mounting bolts, move it outward and tighten the bolts. If the door closes weakly, move the latch inward. In this case, there should not be a protrusion or recession of the door relative to the body. If the door drops when closing, the latch is raised. If it rises, the latch is lowered. In case of poor unlocking of the door with the inside handle, adjust the position of the inside handle. To do this, loosen the screws securing the handle bracket, move it together with the handle to the desired position and tighten the screws.
Power window adjustment
Remove the door trim and lower the glass down. Loosen the pressure plate screws 2 (see fig. 193). Then the glass is lowered to the stop, the window regulator handle 9 is turned in the direction of lowering the glass to the limit, and then half a turn in the opposite direction. With this position of the glass and the cable, the cable is fixed in the holder. This ensures precise movement of the glass.
The smoothness of the mechanism is regulated by the tension of the drive cable by moving the tension roller 10.