
Welding lines for roof and front panels
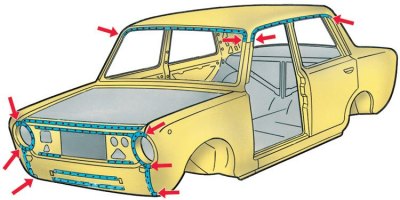
The dots indicate the resistance welding seams.
The arrows indicate the places of preliminary welding by gas welding.
Welding lines for roof and rear panels
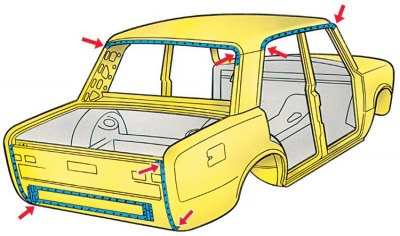
The dots indicate the resistance welding seams.
The arrows indicate the places of preliminary welding by gas welding.
In most emergency cases with roof damage, it needs to be replaced.
1. Remove the gutters, windscreen, rear window, upholstery and roof accessories.
2. After laying the new roof on the body, determine the places for cutting the pillars and side panels of the roof.
3. Chop down the roof connections:
- with body windshield frame panels;
- with rear window frame cross member;
- with body sides.
4. Cut along the curves of the roof, stepping back from the edge of the roof panel 8 mm.
5. Carry out the cutting of the side panels of the roof, stepping back from the marking up 10–15 mm.
6. Detach the roof panel from the body members, remove the remaining roof strips, and clean the body and new roof panel seats.
7. Align the body parts at the junctions with the roof panel and adjust the new roof panel in place.
8. At the points indicated by the arrows in the figures, weld the roof panel to the body elements by gas welding:
- to the windshield panel;
- to the roof side panels.
9. Check roof fit and weld:
- resistance welding with a pitch of 40–50 mm to the wind window frame panel, to the rear window cross member and to the sidewalls;
- gas welding to the side panels of the roof.
10. In the absence of a contact welding machine, gas welding or electric welding in a carbon dioxide environment is allowed.
11. After welding the roof panel into the gaps between the panel and the roof reinforcements, apply glue and install the seals.