
- assistant;
- kapron cord at least 5 m long;
- plastic body of a ballpoint pen;
- a piece of thin steel wire 10 cm long or a paper clip.
Lubricant
1. Disconnect the bent end of the rod from the hood lock lever.
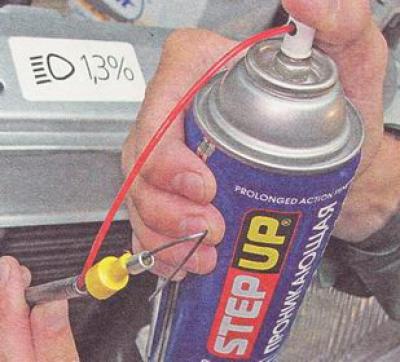
2. Inject a penetrating lubricant into the rod shell.
3. Inject penetrating lubricant into the shell from the other end of the rod (see point 9).
Removing
Note. To replace the hood lock rod together with the shell, it is necessary to perform laborious work - remove the instrument panel. This describes a method that allows you to change the hood lock rod with minimal disassembly. If the rod moves easily in the shell, and you have to change it because it has broken off, then you can only replace the cable by pushing it into the old shell.
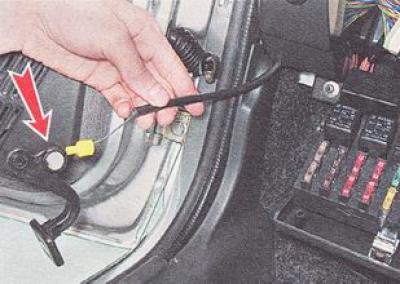
4. Using an 8 mm open-end wrench, unscrew the nut of the tie rod clamp.
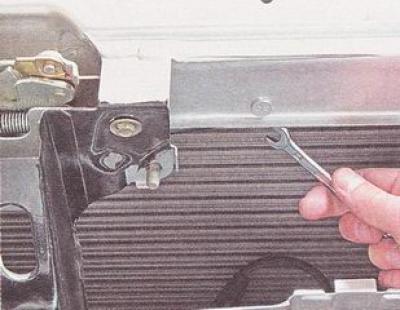
Note. The nut is located above the clamp loop, so access to it is difficult (pictured bottom view).

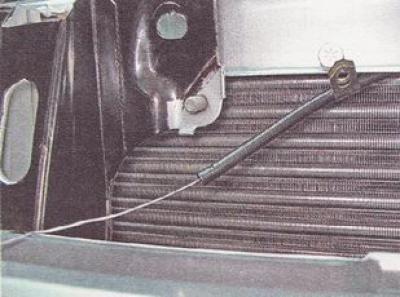
5. Remove the clamp first from the threaded stud, and then from the thrust shell.
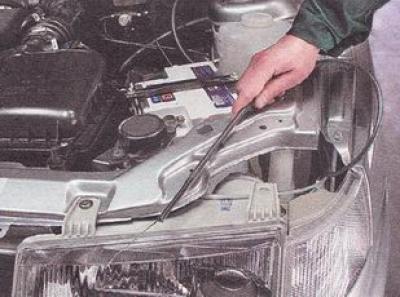
6. Having unscrewed the three bolts, remove the shield of the left block headlight.
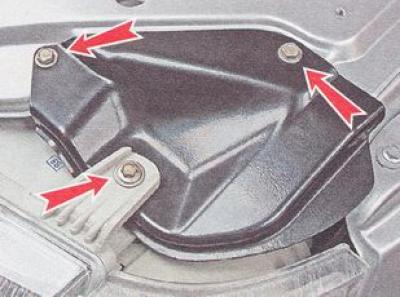
Note. On cars of early years of production, the upper cross member of the front end is of a different shape and does not have a headlight shield.
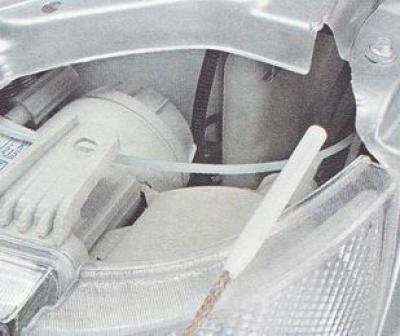
7. We pull out the shell of the hood lock rod into the resulting opening.
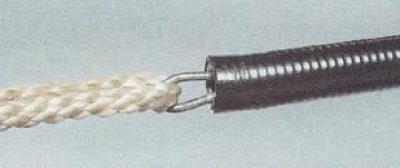
8. We fold the nylon cord in half and put the resulting cord loop on the bent end of the cable. We fill the end of the cable into the shell.
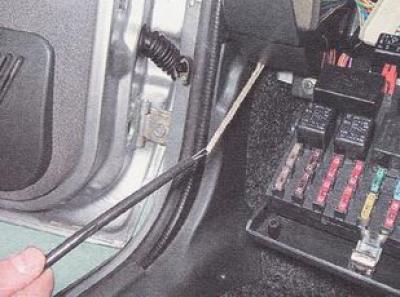
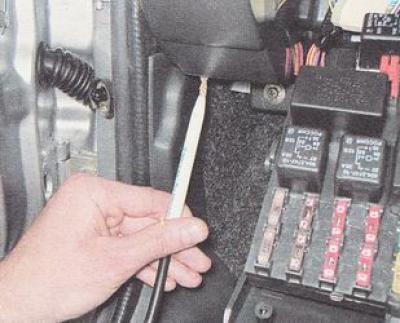
9. 13 mm socket wrench with ratchet (or wrench), through the open cover of the mounting block, unscrew the axis with a hex head of the hood opening handle (for clarity, the photo shows a view with the instrument panel removed, access to the axis is difficult to access by wiring harnesses).
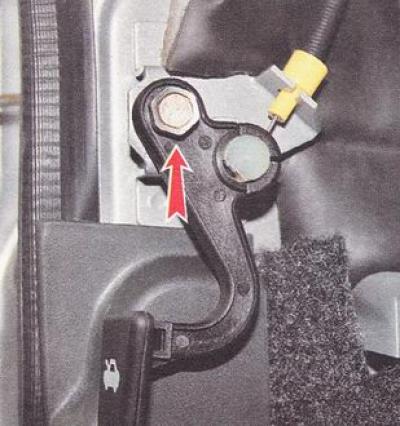
10. We take out the axis of the handle and remove the shell of the rod from the slot of the bracket. We lower the handle under the instrument panel and remove the plastic tip of the rod from the handle.
11. Pull the hood lock rod into the car interior (before the appearance of the cord).
12. Disconnect the cord from the rod and remove the rod assembly with the sheath.
Installation
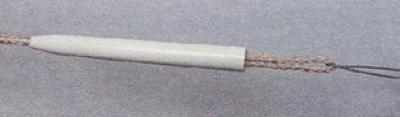
1. With steel wire, bending the loop at the end, we stretch the loop of the cord through the body of the ballpoint pen (the tapered part of the handle body should be directed in the opposite direction from the cord loop).
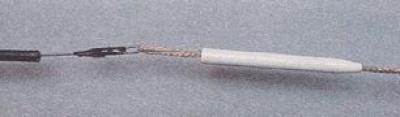
2. With pliers we bend the end of the new rod 3-4 cm long into a loop. We put a cord loop on the bent end of the rod. To securely fix the cord on the rod, we fix the loop with insulating tape.
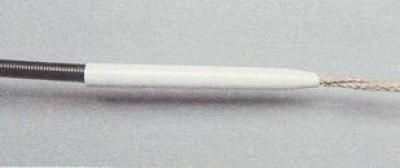
3. We tightly push the part of the handle body onto the shell of the new rod.
We apply a little penetrating liquid to the body of the pen.
4. Insert the plastic tip of the new cable into the hood opening handle (see point 10).
Note. The next step is performed together with an assistant.
5. From the outside of the car, smoothly pull the hood lock drive rod by the cord, at the same time directing the handle body from the passenger compartment into the hole in the rubber seal of the engine compartment partition.
6. Pull the rod out.
7. We fix the lock opening handle on the axis (see point 9).
8. Remove the cord and attach the rod to the hood lock.
Note. When attaching the drive rod to the hood lock lever for fitting, first put the lock in place. Make sure the tie rod is routed correctly - no twisting, sheath creases. Use pliers to fully pull out the rod and mark the place where the rod is bent.
9. Further assembly is carried out in the reverse order of disassembly.