
English Русский
Български
Беларускі
Український
Српски
Hrvatski
Română
Polski
Slovenský
Magyar
| Articles | Contacts | Sitemap |   
Repair and maintenance Lada Repair and maintenance Mazda Repair and maintenance Mitsubishi Repair and maintenance Toyota Repair and maintenance Land Rover Repair and maintenance Hyundai Repair and maintenance Nissan
VAZbook.ru


Main     1111   2101   2105   2106   2107   2109   2110   2115   2121  
VAZ-1111 (1988-1996) VAZ-11113 (1996-2003)
  • Main
  • «Oka»
  • VAZ-11113
  • Power unit
  • Engine repair
  • Replacing the camshaft seal

Replacing the camshaft seal (VAZ-11113)

            0

You will need:
  • key "17"
  • screwdriver

Disconnect the wire from the "–" terminal of the battery.

Set the piston of the first cylinder to the TDC position (see subsection 10.1.).

For ease of operation, remove the air filter (see subsection 10.10.1.) and the ignition coil.

If you find signs of oil leakage through the camshaft oil seal, first check whether the crankcase ventilation system is clogged or whether the crankcase ventilation hoses are pinched, and correct the faults if necessary.

If the oil leak does not stop, replace the oil seal.
If the oil leak does not stop, replace the oil seal.


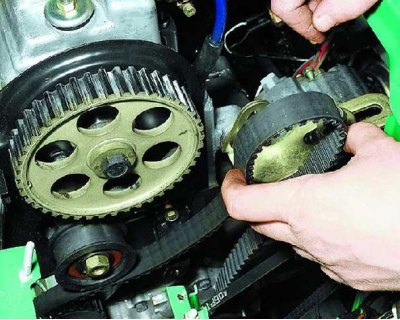
1. Remove the camshaft drive belt from the camshaft pulley, tensioner pulley and water pump pulley (see subsection 10.3.2.) and take it aside.
1. Remove the camshaft drive belt from the camshaft pulley, tensioner pulley and water pump pulley…


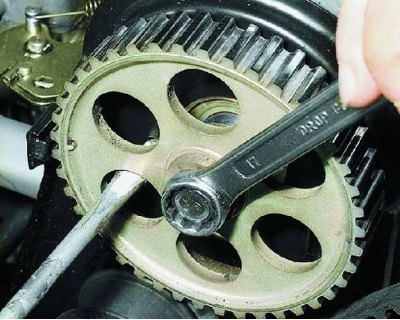
2. Secure the camshaft pulley from turning by inserting a screwdriver into its hole and resting it against the stud; unscrew the pulley mounting bolt.


2. Secure the camshaft pulley from turning by inserting a screwdriver into its hole and resting it…


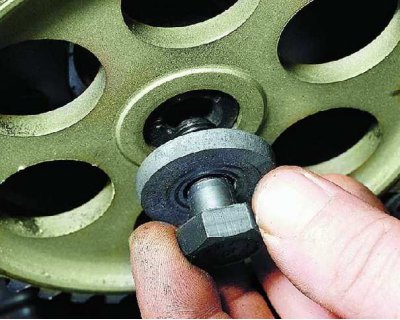
3. Please note: There is a flat washer installed under the bolt.
3. Please note: There is a flat washer installed under the bolt.


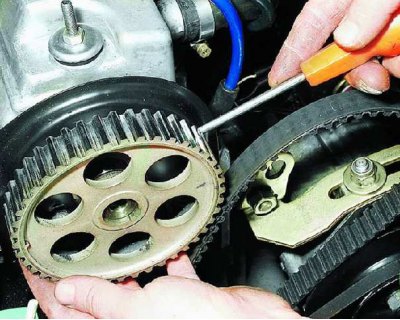
4. Using a screwdriver, remove the pulley from the camshaft.
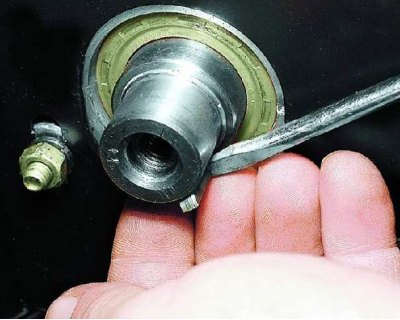
4. Using a screwdriver, remove the pulley from the camshaft.


5. Remove the key from the camshaft if it is not seated tightly in the shaft groove.
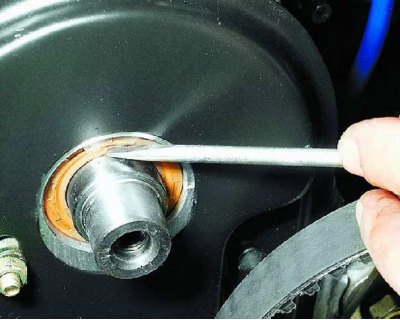
5. Remove the key from the camshaft if it is not seated tightly in the shaft groove.


6. Using a screwdriver, pry out the seal.
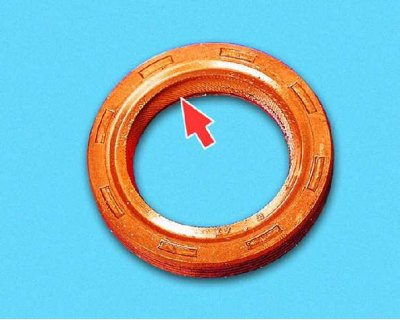

6. Using a screwdriver, pry out the seal.


7. Before installing a new seal, inspect the working edge. It should be smooth, without tears, dents, or rubber build-up.
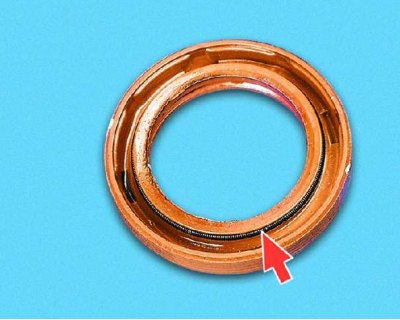
7. Before installing a new seal, inspect the working edge. It should be smooth, without tears,…


The text is copied from the online portal: VazBook.ru

8. The oil seal spring must be intact and unstretched.
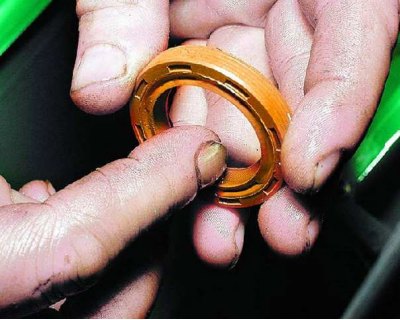
8. The oil seal spring must be intact and unstretched.


9. Before installing a new oil seal, lubricate its working edge with engine oil.
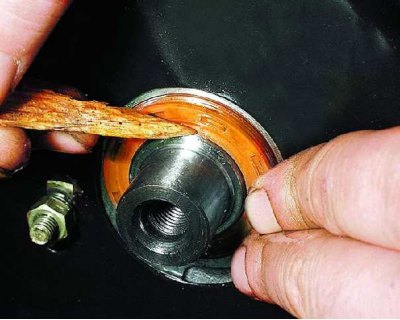
9. Before installing a new oil seal, lubricate its working edge with engine oil.


10. Install the oil seal with the working edge inside the cylinder head, carefully push the working edge onto the camshaft using a wooden stick and...
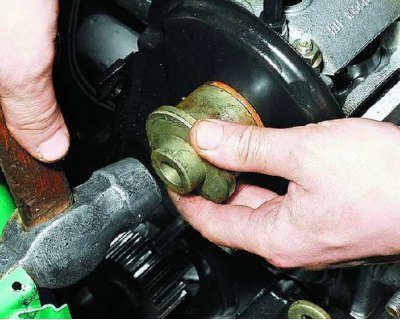
10. Install the oil seal with the working edge inside the cylinder head, carefully push the working…


11....press the seal until it stops using a suitable mandrel.
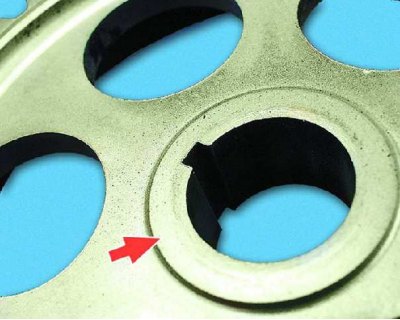
11....press the seal until it stops using a suitable mandrel.


12. Install all parts in the reverse order of removal. In this case, install the camshaft pulley with the protruding part of the hub away from the engine. Adjust the tension of the camshaft drive belt (see subsection 10.3.3.).


This article is available at russian, bulgarian, belarusian, ukrainian, serbian, croatian, romanian, polish, slovak, hungarian
The text was reviewed by the specialist: Grigory Vologodtsev

Share with friends:

Previous articles
VAZ-11113: Engine repair
Next articles

Replacing the cylinder head gasket
Adjusting the camshaft drive belt tension
Replacing the camshaft drive belt
Replacing the camshaft drive belt tension roller
Adjusting valve clearances
Replacing valve stem seals
Replacing the oil pan gasket
Replacing the front crankshaft oil seal
Replacing the rear crankshaft oil seal
Cylinder head repair

More articles from other manuals on VAZ cars:
➠ Replacing the camshaft seal VAZ-2115 (1997-2012)
➠ Replacing the pinion seal VAZ-2101 (1970-1983)
➠ Replacing the camshaft drive belt VAZ-21051 (1979-2010)
➠ Replacing the camshaft drive chain damper VAZ-21061 (1976-2006)
➠ Replacing the camshaft drive belt VAZ-2109 (1984-1997)
Link in different formats to this page


Visitor comments

No comments yet


How much will 42 + 35 ?


VAZ-1111 (1988-1996) 
  • General information
  • Vehicle description
  • Vehicle device
  • Vehicle operation
  • Maintenance
  • Applications
  • Power unit
  • Engine repair
  • Cooling system
  • Lubrication system
  • Supply system
  • Transmission
  • Clutch
  • Transmission
  • Chassis
  • Front suspension and wheels
  • Rear suspension
  • Steering
  • Brake system
  • Body
  • Exterior
  • Interior
  • Electrical equipment
  • Engine electrics
  • Equipment and devices


VAZ-11113 (1996-2003) 
  • General information
  • Introduction to the guide
  • User manual
  • Maintenance
  • Power unit
  • Engine repair
  • Cooling and lubrication system
  • Fuel system
  • Exhaust system
  • Transmission
  • Car gearbox
  • Clutch and drive shafts
  • Chassis
  • Front suspension
  • Rear suspension
  • Steering
  • Brake system
  • Body
  • Exterior
  • Interior
  • Doors and locks
  • Electrical equipment
  • Equipment and devices
  • Lighting and signaling
  • Engine electrics
  • Ignition system


VAZbook.ru © 2017 · Mobile version · Contact with administration · Sitemap: EN BG BY UA RS HR RO PL SK HU · Site search · News and articles VAZ-1111 · VAZ-11113 · VAZ-2101 · VAZ-21011 · VAZ-2104 · VAZ-2105 · VAZ-21051 · VAZ-2106 · VAZ-21061 · VAZ-2107 · VAZ-21099 · VAZ-2109 · VAZ-2108 · VAZ-2110 · VAZ-2112 · VAZ-2114 · VAZ-2115 · VAZ-2121 · VAZ-21213 · VAZ-21214 ·
The site stores technical data using cookies to improve the service.