
Note. Grind the body and cover of the oil pump at a service station with special equipment.
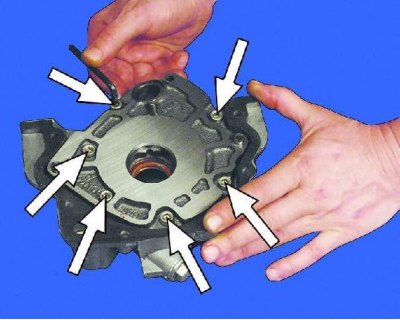
1. Unscrew the six bolts securing the cover and remove it from the pump housing.
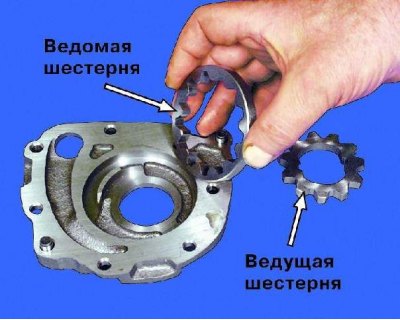
2. Remove the pump gears from the housing.
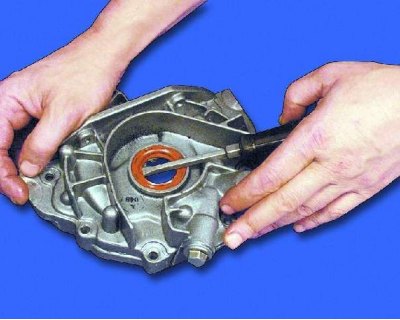
3. Remove the front crankshaft oil seal from the pump housing with a screwdriver.
Note. Maximum allowable axial clearance of oil pump gears, mm:
- leading - 0.12;
- driven - 0.15.
4. Examine the lid. The surface of the cover with signs of wear from the gears should be milled no more than 0.2 mm.
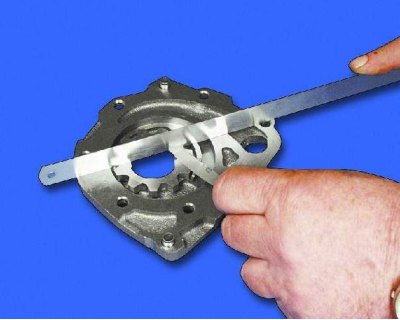
5. Install the drive gear into the pump housing. Put a metal ruler on the pump housing and measure the gap between the ruler and the gear with a feeler gauge.
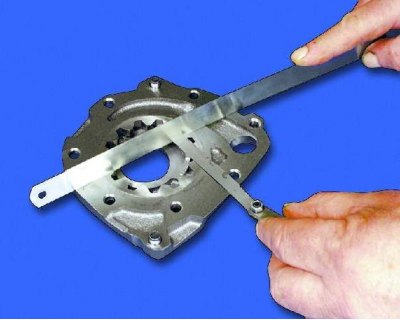
6. Similarly, measure the axial clearance of the driven gear. If the gaps exceed the maximum allowable (see note), sand the surface of the body that mates with the cover.
7. Unscrew the pressure reducing valve plug from the oil pump cover and remove the plunger with the spring.
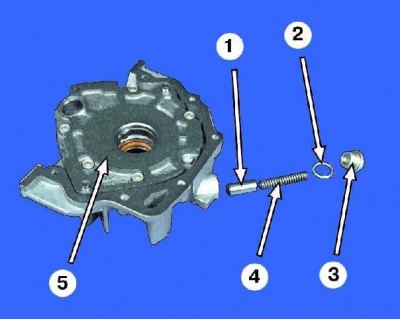
Reducing Valve Details: 1 - plunger; 2 - sealing ring; 3 - plug; 4 - spring; 5 - oil pump
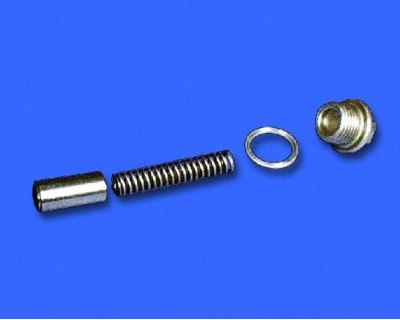
8. Measure the spring. Its free length should be 44.72 mm. If the length is shorter, replace the spring. Plunger with deep scratches and nicks must be replaced. Check the plunger: it should move easily in the hole in the cover. If there is sticking, replace the plunger and (or) cover.

9. Lubricate all parts of the oil pump with engine oil and assemble the pump in the reverse order of assembly. Install the gears so that the chamfer on the tops of the teeth is directed into the housing.

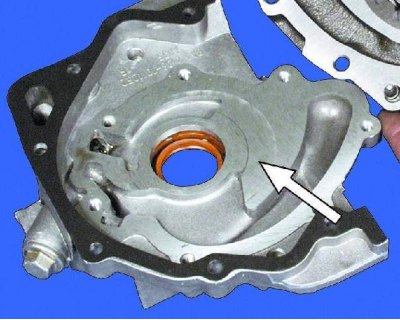
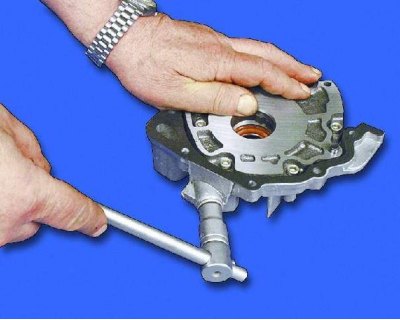
10. Press the gland into the pump cover as shown in the photo (the side of the stuffing box with the spring must face the inside of the pump).