
Warning! Before starting work, read the safety rules for working with the power system (see "Safety measures for the maintenance and repair of the power system").
Removing
1. Relieve pressure in the fuel line (see "Fuel Line - Pressure Relief").
Attention! Depressurize the fuel line even if the vehicle has not been driven for a long time. After depressurizing, a small amount of fuel remains in the fuel lines.
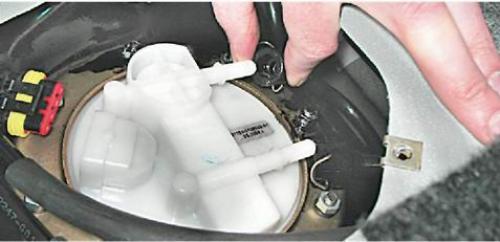
2. We remove the dust accumulated on the fuel module.
3. Apply a penetrating lubricant to the studs and nuts.
4. By pressing the spring clip, disconnect the tip of the fuel line tube from the outlet (forcing) fuel module hose.
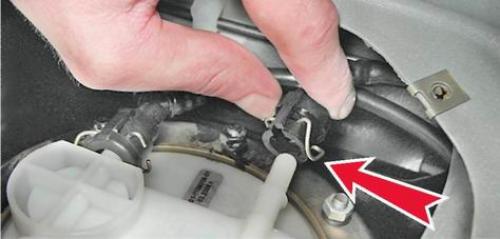
5. Similarly, disconnect the tip of the fuel line from the inlet (drain) fuel module hose.
6. socket wrench by 10 mm unscrew the eight nuts securing the pressure ring of the fuel module. Spring washers are installed under the nuts.
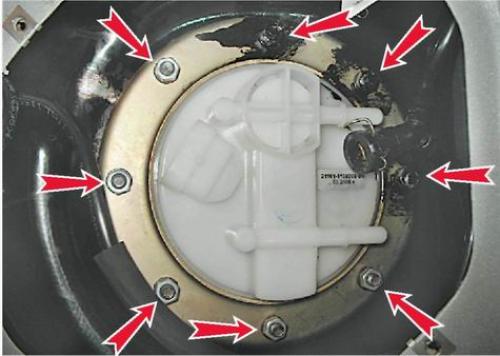
7. Remove the pressure ring of the fuel module.
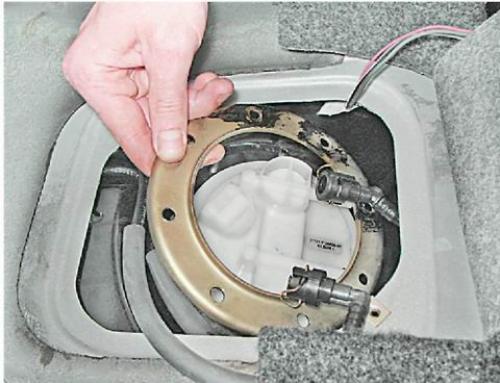
8. A spacer ring and a rubber seal are installed underneath. Replace damaged gasket.
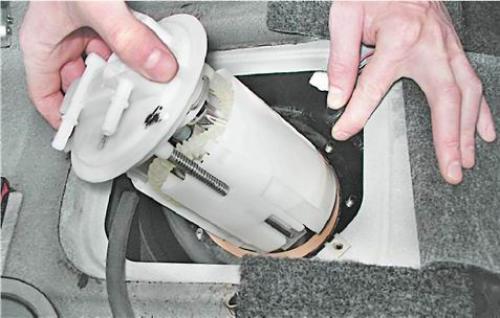
9. We take out the fuel module from the tank.
Warning! When removing the fuel module, do not bend the lever of the fuel gauge sensor. To do this, slightly tilt the module and carefully remove the float from the tank opening.
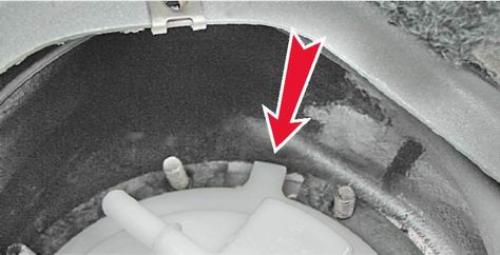
The connection of the fuel module with the tank is sealed with a rubber gasket Replace the damaged gasket
10 Pour gasoline from the fuel module housing into a container with a volume of about 1 liter.
Installation
1. Install the fuel module in reverse order.
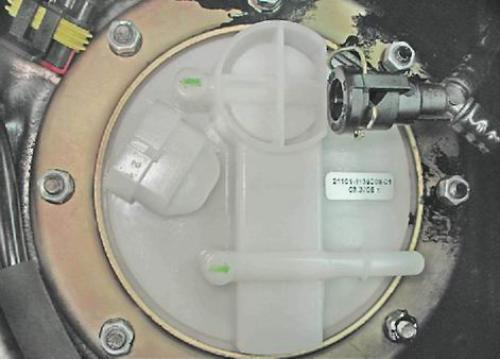
Warning! When installing the module in the tank, make sure that the protrusion on its cover coincides with the cutout in the spacer ring.
The fuel line tee must be connected to the fuel module inlet. In case of fuel leakage, we replace the sealing rings in leaky joints.
2. After connecting the fuel pipes and the wiring harness block, turn on the ignition for 5 seconds and check the tightness of the connections.