
Comment. The operation is shown on the engine 21114. Checking the fuel pressure on other engines is carried out similarly.
Attention! Before performing the operation, read the safety precautions for maintenance and repair of the power system (see "Safety measures for the maintenance and repair of the power system").
To perform the work, you will need a special pressure gauge.
Execution sequence
1. We prepare the car for work (see "Preparing the car for maintenance and repair").
2. On engines models 2112, 21114 and 21124 remove decorative trim (see "Decorative overlay of the engine - removal and installation").
3. Turn off the protective cap of the diagnostic fitting of the fuel rail.
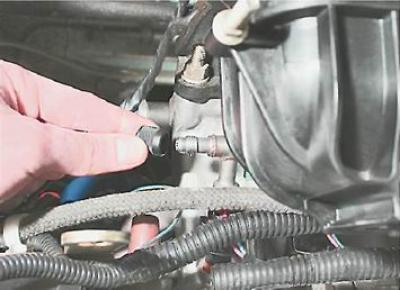
4. We connect the tip of the pressure gauge hose to the fuel rail fitting.
5. Open end wrench by 14 mm twist the end of the hose.
Advice. If necessary, the pressure in the fuel rail can be measured with a home-made device, made from a pressure gauge from a foot pump. Before connecting such a pressure gauge, it is necessary to relieve the fuel pressure (see "Fuel Line - Pressure Relief"). After that, unscrew the spool from the fuel rail fitting. This can be done with a metal wheel valve cap. To connect the pressure gauge to the fuel rail fitting, use a piece of gasoline-resistant hose of a suitable diameter. The ends of the hoses must be securely fastened with clamps.
6. Turn on the ignition. The fuel pump will then operate for a few seconds. After waiting for the pump to stop working, turn off the ignition.
7. To remove air from the pressure gauge, lowering the end of the drain tube into a small container, unscrew the bleed valve of the pressure gauge by 1/3-1/2 turn and relieve the excess pressure of gasoline from the fuel rail. This will remove air from the pressure gauge hose.
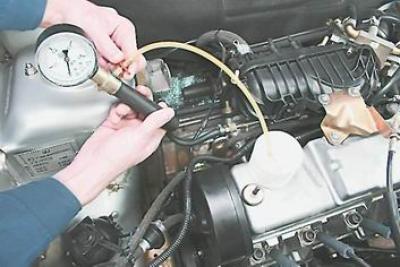
8. We wrap the bleeder fitting until it stops.
We start the engine and measure the working pressure in the fuel rail at different crankshaft speeds. For a serviceable engine, it should be within: for engines 2111 and 2112 - 284-325 kPa (2.8-3.2 bar); for engines 21114 and 21124 - 378-390 kPa (3.8-3.9 bar).
Note. On 16-valve engines, the operation is as follows:
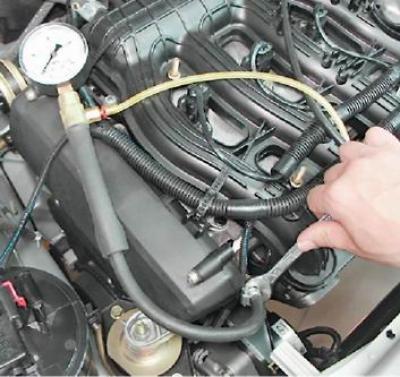
On engines 2111 and 2112 disconnect the rubber hose from the pressure regulator pipe. If after that the fuel pressure has not increased by more than 0.2 bar, then the regulator is faulty.
9. Turn off the ignition.
10. Having lowered the end of the tube into the container, open the fitting and relieve pressure from the fuel line.
11. Disconnect the pressure gauge from the diagnostic fitting of the fuel rail.
12. We screw the protective cap onto the fuel rail fitting.
Recommendation. If the operating pressure in the fuel rail is unstable or higher than normal, then the fuel pressure regulator is faulty (see "Fuel module for 21114 and 21124 engines (1,6i) - replacement of the fuel pressure regulator", "Fuel rail engine 2111 (1,5i 8v) - replacement of the fuel pressure regulator", or "Fuel rail engine 2112 (1,5i 16v) - removal, disassembly, assembly and installation"). Low pressure (less than normal) can also be caused by a faulty regulator. It is possible that the fuel pump strainer is clogged or the fuel pump is not developing the required pressure. To clean the strainer, you need to remove the fuel module (see "Fuel module for 2111 and 2112 engines (1,5i) - removal and installation", or "Fuel module for 21114 and 21124 engines (1,6i) - removal and installation".