
Reassemble in reverse order.
Control. Check if there are any scratches on crackers 9 and on rod 3, and on the mating surfaces of the shoe of the poppy and the plunger of the chain tensioner there are deep scratches. Replace damaged parts.
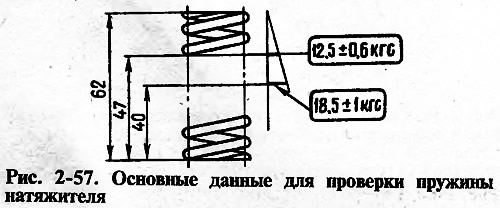
The elasticity of the tensioner spring must be within the limits indicated in Fig. 2-57; If the spring is less elastic, replace it.
Check for excessive wear on the shoe and damper; if necessary, replace them.