
- an additional rear driveshaft was introduced;
- intermediate support installed;
- The front universal joint of the shaft has been replaced with a constant velocity joint.
- the propeller shaft safety bracket is installed.
Dismantling the driveline
Before disassembling a driveline removed from the vehicle, apply marks to the parts to be separated in order to connect them during assembly in the same position and keep the balance of the shafts unchanged.
Having separated the shafts, unscrew the nut securing the flange of the additional cardan shaft, then remove the flange from the splines using a puller А.40005/1/5.
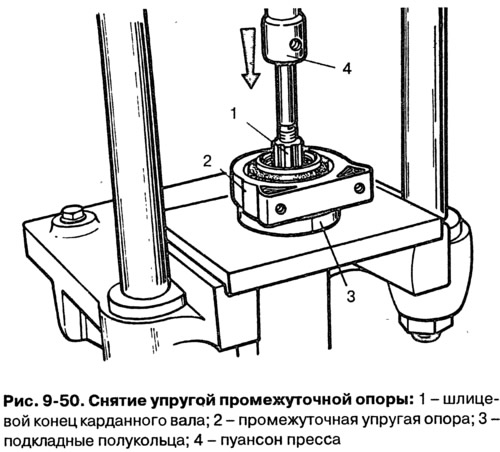
Remove the intermediate support assembly with the bearing under pressure using shims (pic. 9-50).
When checking the technical condition of the intermediate bearing, check the condition of the bearing by turning the inner ring in both directions while pressing it against the outer ring. In this case, the inner ring of the bearing should rotate smoothly, without jamming. Also check the condition of the bearing seals. If the bearing is worn or damaged, replace it with a new one. Check for damage or deformation of the intermediate support. If necessary, replace it with a new one.
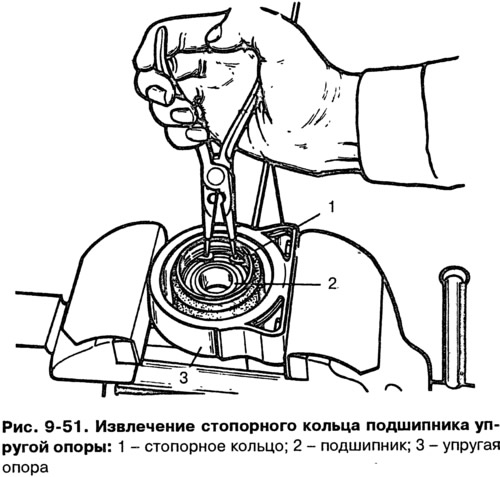
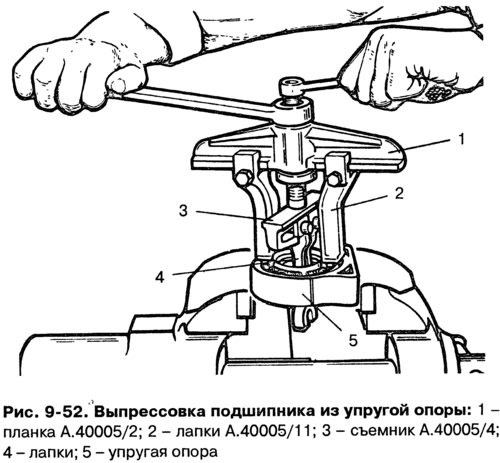
To disassemble the intermediate support, remove the retaining ring (pic. 9-51), and with a puller A.40005/2/4/11, press the bearing out of the support (pic. 9-52).
Cardan assembly
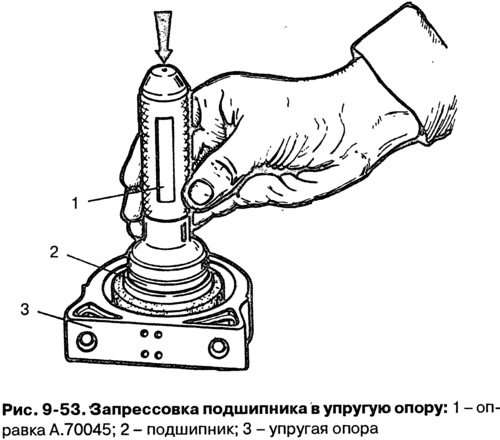
When assembling the intermediate support, press the bearing with a mandrel (pic. 9-53) and install a snap ring in the groove of the support.
Before installing the intermediate support, put the dust deflector on the rear end of the auxiliary shaft. Then press the support with the bearing with a mandrel (pic. 9-54) and put on the second dust deflector. Apply FIOL-1 grease to the spline connection and, having aligned the marks, press the flange. Tighten the flange fastening nut to 8.5 Nm and caulk.

Pic. 9-54. Installing the elastic support on the cardan shaft:
1 - mandrel A.74035; 2 - elastic support; 3 - cardan shaft.