English Русский
Български
Беларускі
Український
Српски
Hrvatski
Română
Polski
Slovenský
Magyar
| Articles | Contacts | Sitemap |   
Repair and maintenance Lada Repair and maintenance Mazda Repair and maintenance Mitsubishi Repair and maintenance Toyota Repair and maintenance Land Rover Repair and maintenance Hyundai Repair and maintenance Nissan
VAZbook.ru


Main     1111   2101   2105   2106   2107   2109   2110   2115   2121  
VAZ-2121 (1977-1994) VAZ-21213 (1994-2006) VAZ-21214 (1994-2006)
  • Main
  • «Niva»
  • VAZ-21214
  • Chassis
  • Brake system
  • Replacing rear brake pads

Replacing rear brake pads (VAZ-21214)

            0

The minimum permissible thickness of brake shoe linings is 1.5 mm.

To assess the condition of the brake pads without removing the drum, there is an inspection window in the brake shield.
To assess the condition of the brake pads without removing the drum, there is an inspection window…


We remove the plug from the shield.

To replace the pads, place the car on a viewing pit or lift. Remove the rear wheel and loosen the parking brake system drive cable (see Adjustment and removal of parking brake system components).
To replace the pads, place the car on a viewing pit or lift. Remove the rear wheel and loosen the…


Before unscrewing the bolts securing the brake drum to the axle flange, tap their heads.

Bolts with a reduced head height are used to fasten the brake drum. Therefore, to unscrew them, it is better to use a hexagonal tool head, in which the working edges start immediately from its end (if necessary, the head can be faceted).
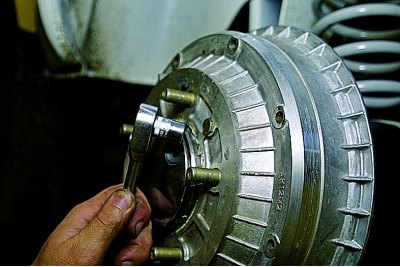


Bolts with a reduced head height are used to fasten the brake drum. Therefore, to unscrew them, it…


Using a 12 mm socket, unscrew the two bolts securing the brake drum to the axle shaft.

To remove the drum, the removed bolts can be screwed into the two threaded holes of the drum (unlike the mounting holes, the threaded holes are arranged symmetrically). When tightened, the bolts will rest against the axle flange and shift the drum.
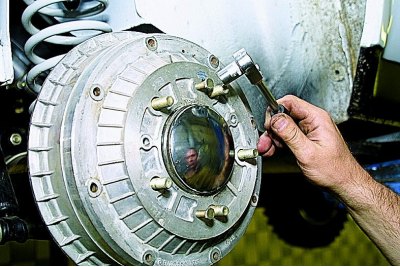
To remove the drum, the removed bolts can be screwed into the two threaded holes of the drum…


We screw the bolts into the threaded holes.

You can also remove the drum,…
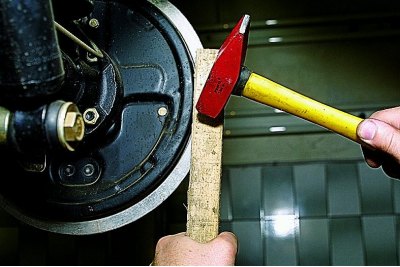
You can also remove the drum,…


The text is on the website VAZBOOK.RU


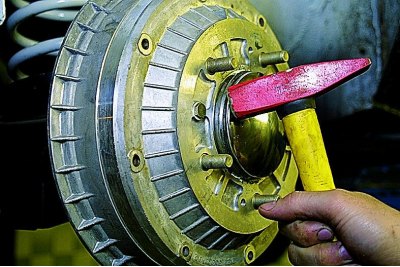
...by striking the end of the drum with a hammer through a wooden block. We strike evenly, turning the drum.
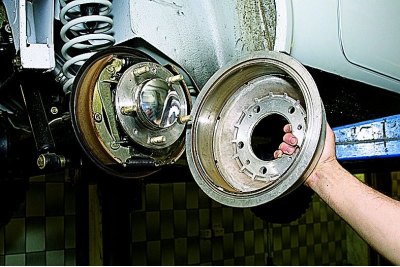
...by striking the end of the drum with a hammer through a wooden block. We strike evenly, turning…


We remove the drum.

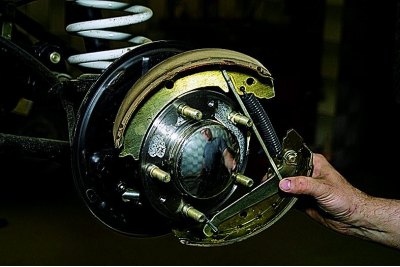
We show two ways to remove brake pads.

When removing using the first method…
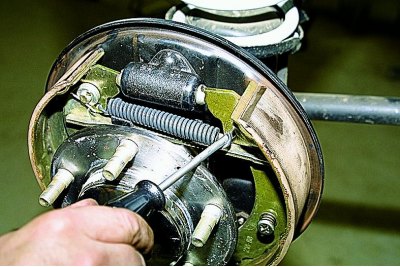
When removing using the first method…


…use a screwdriver to disconnect the end of the upper tension spring from the shoe…
…use a screwdriver to disconnect the end of the upper tension spring from the shoe…


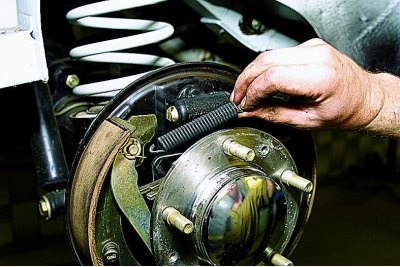
…and we take out the spring.
…and we take out the spring.


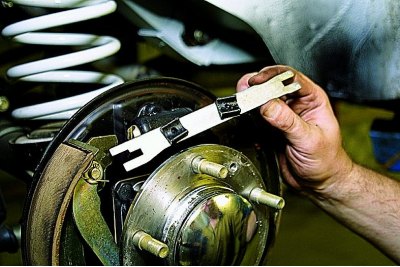
We remove the spacer bar.
We remove the spacer bar.


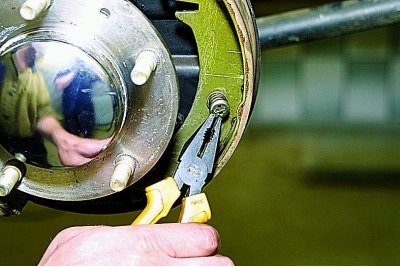
Using pliers, turn the tailpiece of the front brake shoe until it aligns with the slot in the outer cup.
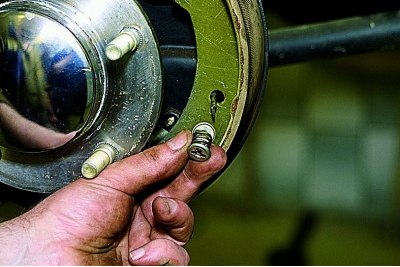
Using pliers, turn the tailpiece of the front brake shoe until it aligns with the slot in the outer…


We remove the spring with the outer and inner cups.
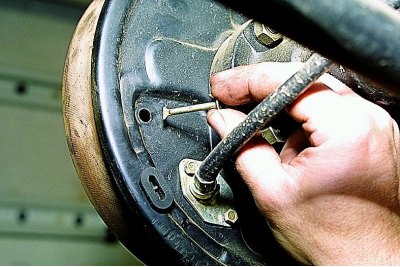
We remove the spring with the outer and inner cups.


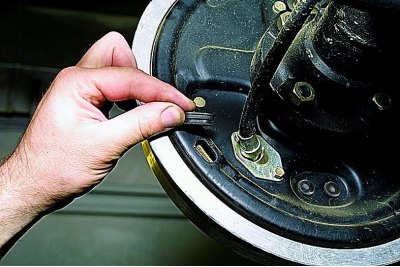
On the other side of the brake shield we take out the stand.
On the other side of the brake shield we take out the stand.


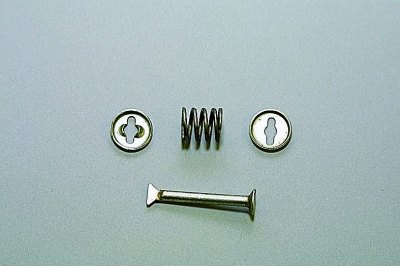
Elements of the support stand of the shoe.
Elements of the support stand of the shoe.


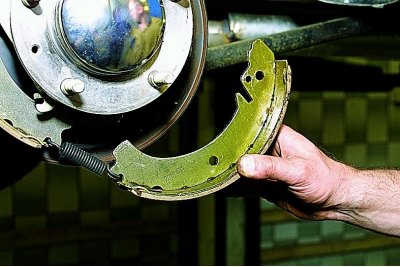
We move the front shoe away..
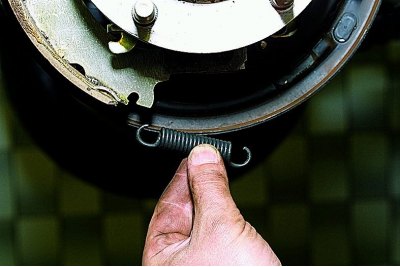
We move the front shoe away..


…and remove the lower tension spring.

We remove the rear brake shoe support.
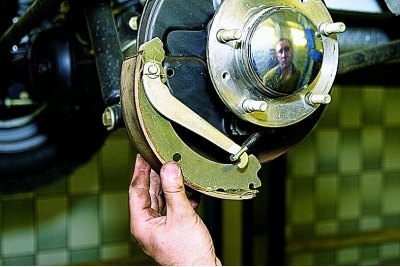
We remove the rear brake shoe support.


We move the rear brake shoe away..
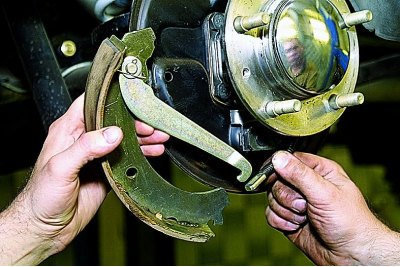
We move the rear brake shoe away..


…and we remove the manual brake pad drive lever from the end of the rear parking brake cable.

When removing the brake pads using the second method, we remove the support posts of both pads.
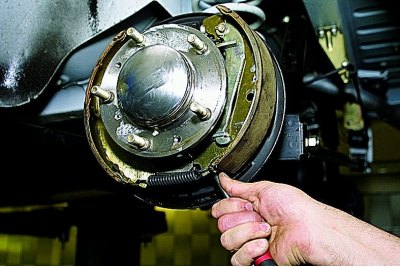
When removing the brake pads using the second method, we remove the support posts of both pads.


We pry off the rear brake shoe with a screwdriver (or pull it with your hand) and we remove its lower stop from the support plate.
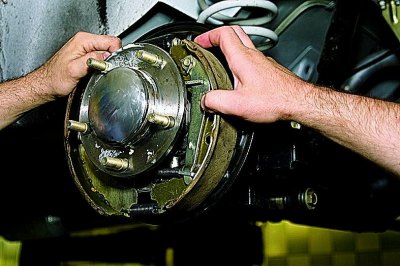
We pry off the rear brake shoe with a screwdriver (or pull it with your hand) and we remove its…


We lower the brake pads down with our hands, removing their upper stops from the slots of the wheel cylinder pistons.
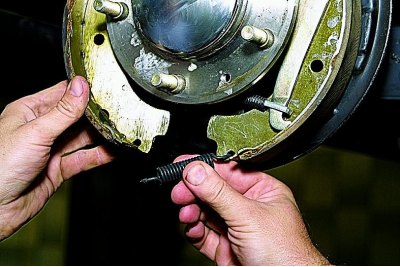
We lower the brake pads down with our hands, removing their upper stops from the slots of the wheel…


We remove the lower tension spring.

We remove the lower tension spring.


We remove the pads together with the spacer bar and spring from behind the axle flange.

We carry out the operation carefully so as not to damage the wheel cylinder dust boots.
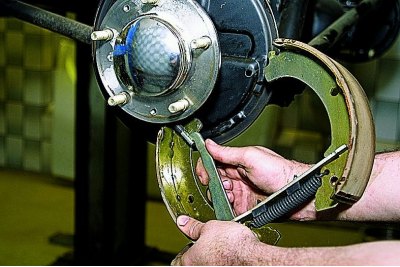
We carry out the operation carefully so as not to damage the wheel cylinder dust boots.


We remove the manual brake pad drive lever from the end of the rear parking brake cable..
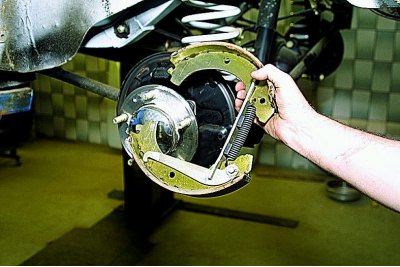
We remove the manual brake pad drive lever from the end of the rear parking brake cable..


…and remove the brake pads with the spacer bar and the upper tension spring.
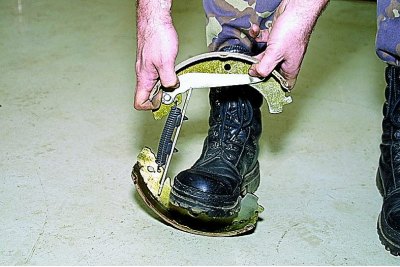
…and remove the brake pads with the spacer bar and the upper tension spring.


Holding one of the blocks on the floor with your foot, we stretch the spring..
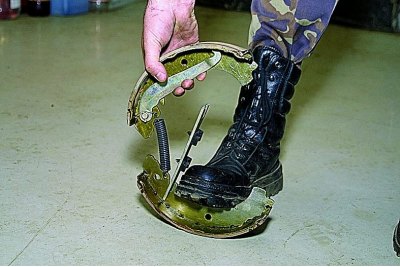
Holding one of the blocks on the floor with your foot, we stretch the spring..


…and we remove the spacer bar from the stop.
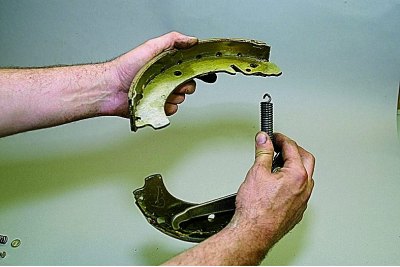
…and we remove the spacer bar from the stop.


We remove the upper tension spring.

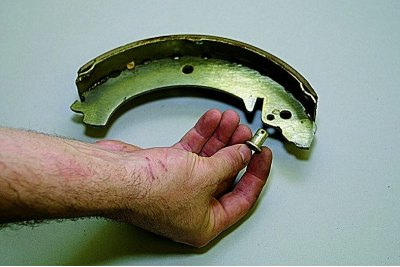
To remove the brake pad manual release lever…
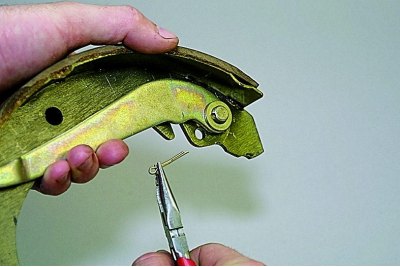
To remove the brake pad manual release lever…


…we remove the cotter pin from its axle.
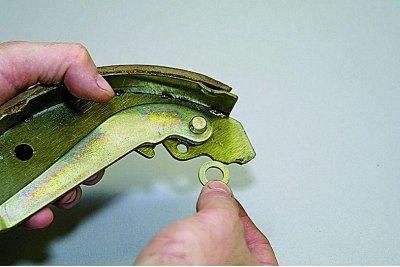
…we remove the cotter pin from its axle.


We remove the washer,…
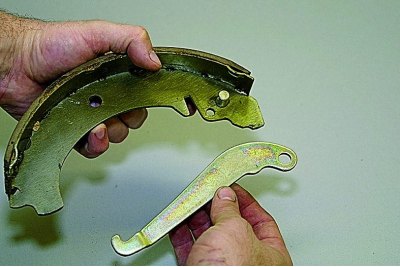
We remove the washer,…


…lever…

…lever…


…and we take out the axle.

Assembly and installation of the pads is carried out in the reverse order (depending on the method of disassembly). In the second method, before installing the second brake pad, we fix the first one from moving by installing a support stand.

When installing new pads, it is necessary to press the pistons into the wheel cylinder. This operation can be performed as follows:
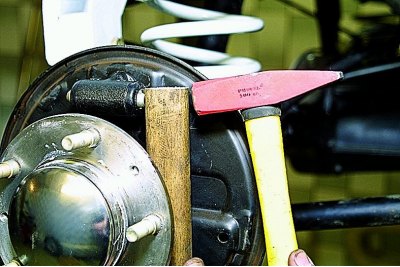
When installing new pads, it is necessary to press the pistons into the wheel cylinder. This…


carefully striking the piston with a hammer through a wooden block..
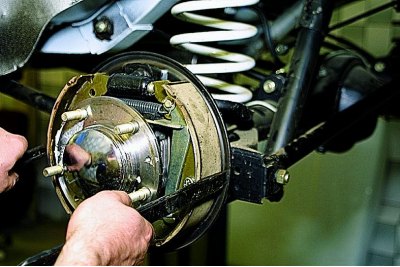
carefully striking the piston with a hammer through a wooden block..


...or having installed the pads, we press on them, leaning two mounting blades on the flange of the brake shield. In this case, the upper stops of the pads press the pistons into the cylinder.

After installing new brake pads, it is necessary to adjust the parking brake system (see Adjustment and removal of parking brake system components).


This article is available at russian, bulgarian, belarusian, ukrainian, serbian, croatian, romanian, polish, slovak, hungarian
The text was reviewed by the specialist: Grigory Vologodtsev

Share with friends:

Previous articles
VAZ-21214: Brake system
Next articles

Replacing the front brake pads
Bleeding brakes
Design features of the brake system
Elements of the braking system
Removal the brake master cylinder reservoir
Removal the master brake cylinder
Removal the brake booster and adjusting the brake pedal free travel
Disassembling the front brake mechanism
Removal the front brake hose

More articles from other manuals on VAZ cars:
➠ Replacing rear brake pads VAZ-1111 (1988-1996)
➠ Replacing rear brake pads VAZ-21061 (1976-2006)
➠ Checking the condition and replacing the brake pads of the rear… VAZ-2109 (1984-1997)
➠ Replacing rear brake pads VAZ-2115 (1997-2012)
➠ Replacing the front brake pads VAZ-21011 (1974-1983)
Link in different formats to this page


Visitor comments

No comments yet


How much will 22 + 39 ?


VAZ-2121 (1977-1994) 
  • General information
  • Vehicle device
  • Car VAZ-21219
  • Power unit
  • Engine repair
  • Cooling system
  • Lubrication system
  • Supply system
  • Transmission
  • Clutch
  • Car gearbox
  • Transfer case
  • Cardan gear
  • Rear axle and gearbox
  • Front axle
  • Chassis
  • Front suspension
  • Rear suspension
  • Steering
  • Brake system
  • Body
  • Exterior
  • Interior
  • Doors and windows
  • Electrical equipment
  • Equipment and devices
  • Headlights and lighting
  • Engine electrics


VAZ-21213 (1994-2006) 
  • General information
  • Vehicle device
  • User manual
  • Power unit
  • Engine repair
  • Cooling and lubrication system
  • Supply system
  • Transmission
  • Clutch
  • Car gearbox
  • Transfer case
  • Cardan gear
  • Rear axle and shafts
  • Front axle and wheel drive
  • Chassis
  • Wheel suspension
  • Steering
  • Brake system
  • Body
  • Exterior
  • Interior
  • Electrical equipment
  • Engine electrics
  • Equipment and devices


VAZ-21214 (1994-2006) 
  • General information
  • Vehicle information
  • Troubleshooting
  • Power unit
  • Engine repair
  • Cooling system
  • Fuel system (carburetor)
  • Fuel system (injector)
  • Ignition system
  • Control system
  • Exhaust system
  • Transmission
  • Clutch
  • Car gearbox
  • Transfer case
  • Cardan gear
  • Front axle
  • Rear axle
  • Chassis
  • Front suspension
  • Rear suspension
  • Steering
  • Brake system
  • Body
  • Exterior
  • Interior
  • Doors, covers and windows
  • Ventilation and heating
  • Electrical equipment
  • Equipment and devices
  • Headlights and lighting
  • Engine electrics
  • Electrical circuits


VAZbook.ru © 2017 · Mobile version · Contact with administration · Sitemap: EN BG BY UA RS HR RO PL SK HU · Site search · News and articles VAZ-1111 · VAZ-11113 · VAZ-2101 · VAZ-21011 · VAZ-2104 · VAZ-2105 · VAZ-21051 · VAZ-2106 · VAZ-21061 · VAZ-2107 · VAZ-21099 · VAZ-2109 · VAZ-2108 · VAZ-2110 · VAZ-2112 · VAZ-2114 · VAZ-2115 · VAZ-2121 · VAZ-21213 · VAZ-21214 ·
The site stores technical data using cookies to improve the service.