English Русский
Български
Беларускі
Український
Српски
Hrvatski
Română
Polski
Slovenský
Magyar
| Articles | Contacts | Sitemap |   
Repair and maintenance Lada Repair and maintenance Mazda Repair and maintenance Mitsubishi Repair and maintenance Toyota Repair and maintenance Land Rover Repair and maintenance Hyundai Repair and maintenance Nissan
VAZbook.ru


Main     1111   2101   2105   2106   2107   2109   2110   2115   2121  
VAZ-2121 (1977-1994) VAZ-21213 (1994-2006) VAZ-21214 (1994-2006)
  • Main
  • «Niva»
  • VAZ-21214
  • Electrical equipment
  • Engine electrics
  • Removal and disassembly of the generator 9412.3701 injection engine

Removal and disassembly of the generator 9412.3701 injection engine (VAZ-21214)

            0

Disconnect the negative cable from the battery.

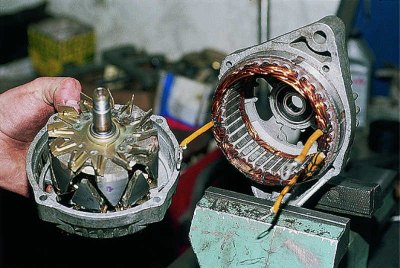
Remove the oil pan protection plate and the right engine mudguard (see Removal the oil pan protection plate and mudguards of the injection engine).
Remove the oil pan protection plate and the right engine mudguard (see Removal the oil pan…


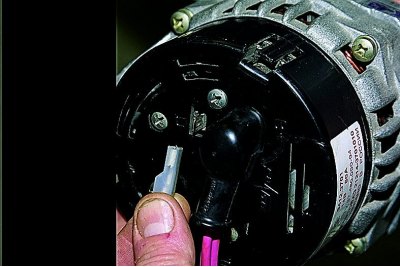
Disconnect the generator terminal "D" wire.
Disconnect the generator terminal «D» wire.


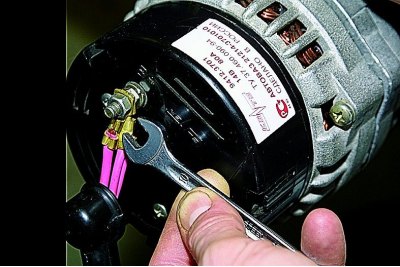
Having moved the rubber cover, using a 10 mm wrench, we unscrew the nut securing the wires to terminal "B"…
Having moved the rubber cover, using a 10 mm wrench, we unscrew the nut securing the wires to…


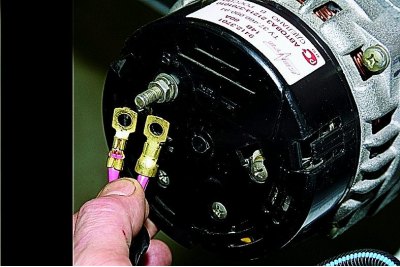
…and we take them off.


Remove the coolant pump drive belt (see Adjusting the tension and replacing the coolant pump drive belt).
Remove the coolant pump drive belt (see Adjusting the tension and replacing the coolant pump drive…


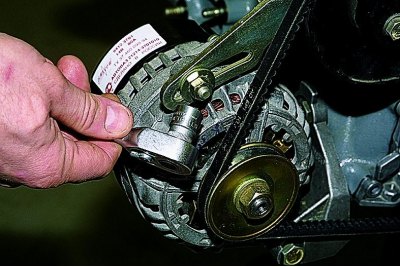
Using a 13 mm head, unscrew the nut of the generator mounting bolt to the tension bar.

Using a 13 mm spanner, unscrew the nut of the generator lower mounting bolt to the bracket on the cylinder block and remove the bolt. Remove the generator from the engine compartment downwards.
Using a 13 mm spanner, unscrew the nut of the generator lower mounting bolt to the bracket on the…


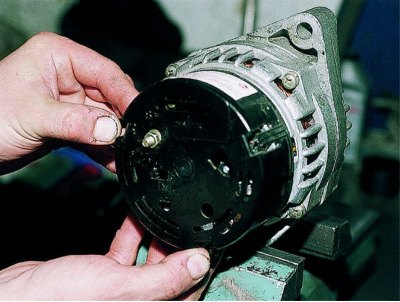
Having released the three tabs of the casing,…
Having released the three tabs of the casing,…


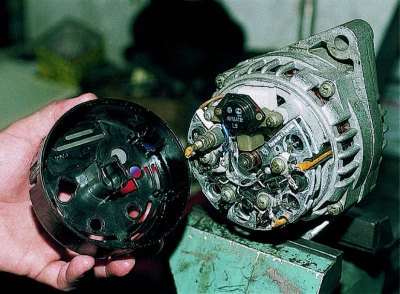
…we take it off.

…we take it off.


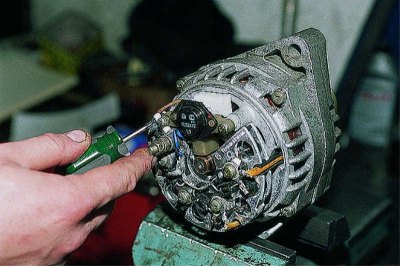
Using a Phillips screwdriver, unscrew the two screws..
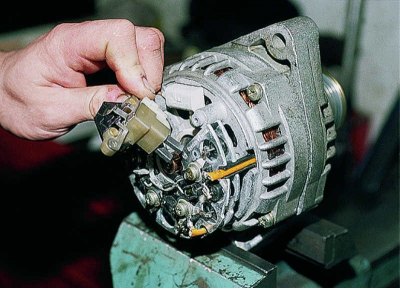
Using a Phillips screwdriver, unscrew the two screws..


…and we remove the voltage regulator with the brush holder.
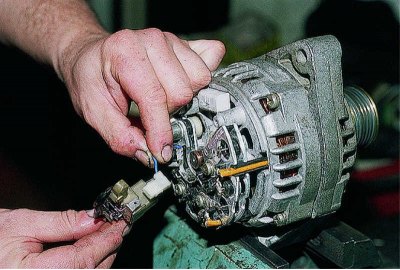
…and we remove the voltage regulator with the brush holder.


We disconnect the wire and remove the voltage regulator with the brush holder.

We disconnect the wire and remove the voltage regulator with the brush holder.
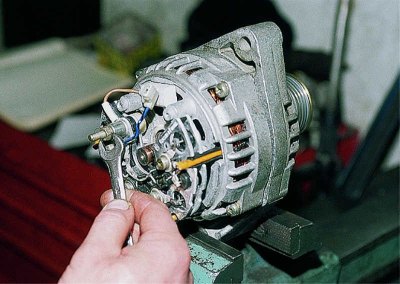

Using a 10 mm spanner, unscrew the nut…
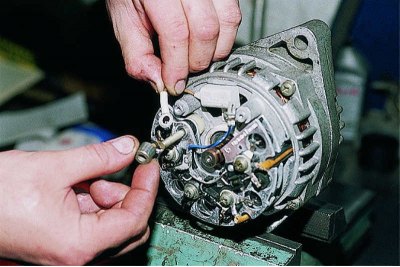
Using a 10 mm spanner, unscrew the nut…


…we remove the sleeve and the capacitor wire.
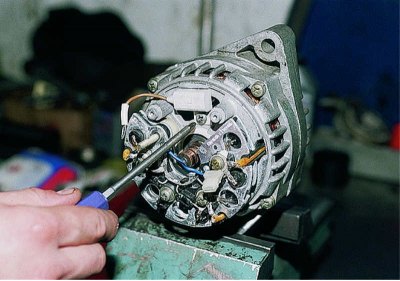
…we remove the sleeve and the capacitor wire.


After unscrewing the screw with a Phillips screwdriver,…
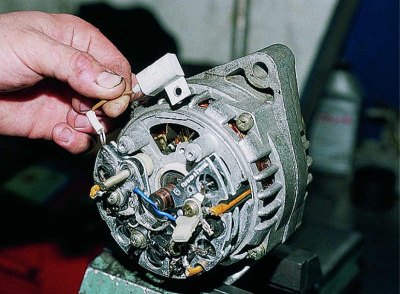
After unscrewing the screw with a Phillips screwdriver,…


…we remove the capacitor.
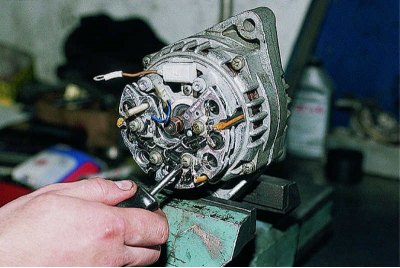
…we remove the capacitor.


Using a Phillips screwdriver, unscrew the screw securing the rectifier block and the three screws securing the ends of the stator windings.
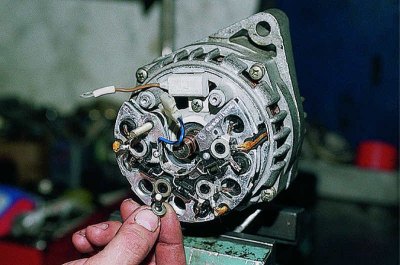
Using a Phillips screwdriver, unscrew the screw securing the rectifier block and the three screws…


Insulating washers are placed on the screws securing the ends of the stator windings.

Insulating washers are placed on the screws securing the ends of the stator windings.
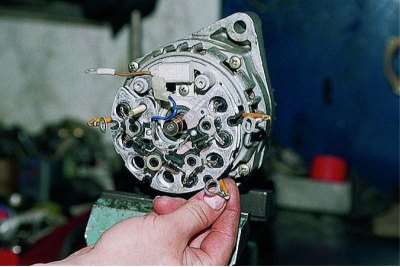

We take away the ends of the stator windings..
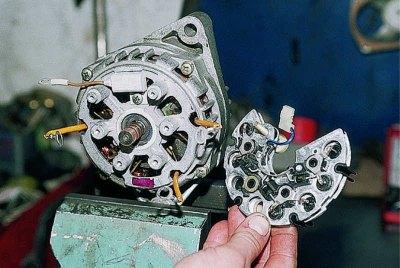
We take away the ends of the stator windings..


…and remove the rectifier block.
…and remove the rectifier block.


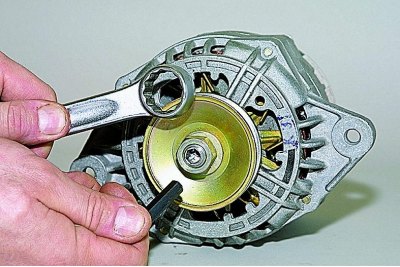
Using a 21 mm open-end wrench, loosen the pulley mounting nut while holding the rotor with an 8 mm Allen key.
Using a 21 mm open-end wrench, loosen the pulley mounting nut while holding the rotor with an 8 mm…


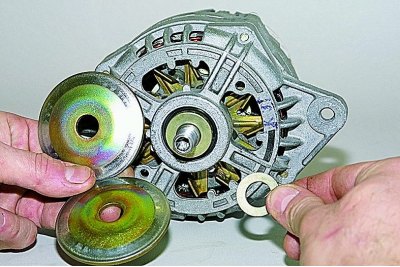
We remove the washer and pulley parts.
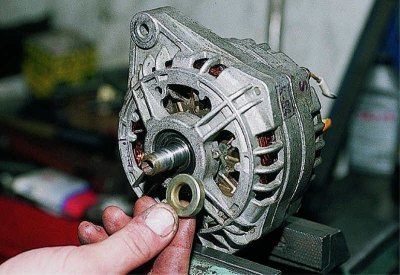
We remove the washer and pulley parts.


Remove the washer from the rotor shaft.
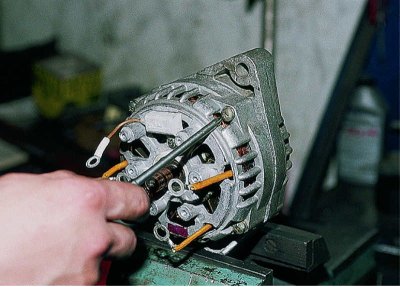
Remove the washer from the rotor shaft.


Using a Phillips screwdriver, unscrew the four screws holding the covers together.

Using a sharp scriber or paint, mark the relative positions of the covers and the stator for subsequent assembly.
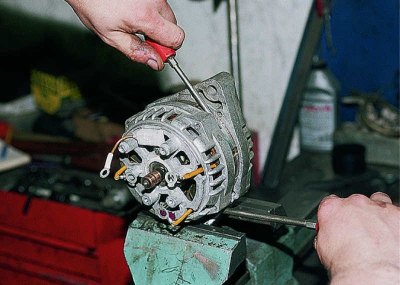
Using a sharp scriber or paint, mark the relative positions of the covers and the stator for…


Prying it off with a screwdriver,…

Prying it off with a screwdriver,…


…we separate the front cover with the stator and the rear cover with the rotor.

Using a screwdriver, pry the stator...
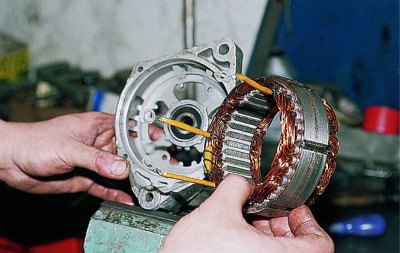
Using a screwdriver, pry the stator...


...we take it out of the front cover.
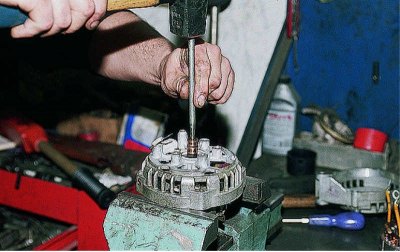
...we take it out of the front cover.


With a punch that rests strictly against the end of the rotor shaft (to avoid damaging the plastic bushing located under the contact rings),…
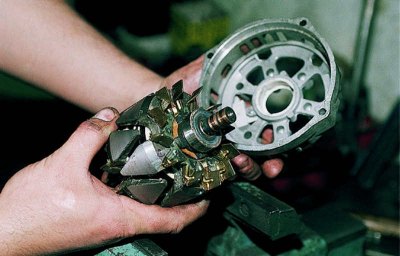
With a punch that rests strictly against the end of the rotor shaft (to avoid damaging the plastic…


…we knock the rotor with the bearing out of the rear cover.
…we knock the rotor with the bearing out of the rear cover.


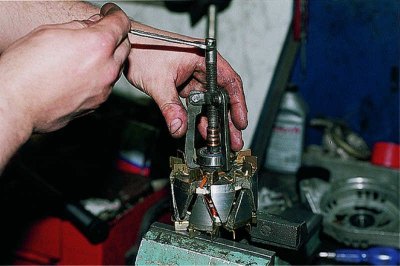
Using a puller, we press the bearing off the rotor shaft.
Using a puller, we press the bearing off the rotor shaft.


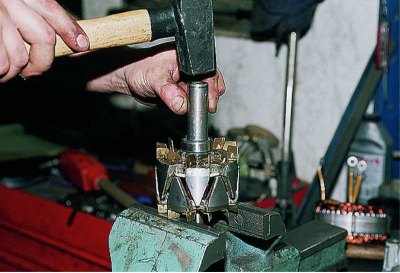
We press the new bearing onto the shaft using a suitable piece of pipe, applying force to the inner ring.

Using a tester, we check the stator and rotor windings for breakage or short circuit to the housing.


This article is available at russian, bulgarian, belarusian, ukrainian, serbian, croatian, romanian, polish, slovak, hungarian
The text was reviewed by the specialist: Grigory Vologodtsev

Share with friends:

Previous articles
VAZ-21214: Engine electrics
Next articles

Checking the generator
Description of the generator design
Rechargeable battery
Removal the generator 371.3701
Description of the starter design
Removal the starter
Disassembling the starter 5722.3708
Disassembling the starter 35.3708

More articles from other manuals on VAZ cars:
➠ Starting an engine with a fuel injection system VAZ-2105 (1979-2010)
➠ Cylinder head gasket for injection engine — replacement VAZ-2107 (1982-2012)
➠ Receiver of injection engine 2112 (1.5i) — removal and… VAZ-2110 (1995-2007)
➠ The structure of a car engine VAZ-1111 (1988-1996)
➠ General structure of a car engine VAZ-2101 (1970-1983)
Link in different formats to this page


Visitor comments

No comments yet


How much will 20 + 15 ?


VAZ-2121 (1977-1994) 
  • General information
  • Vehicle device
  • Car VAZ-21219
  • Power unit
  • Engine repair
  • Cooling system
  • Lubrication system
  • Supply system
  • Transmission
  • Clutch
  • Car gearbox
  • Transfer case
  • Cardan gear
  • Rear axle and gearbox
  • Front axle
  • Chassis
  • Front suspension
  • Rear suspension
  • Steering
  • Brake system
  • Body
  • Exterior
  • Interior
  • Doors and windows
  • Electrical equipment
  • Equipment and devices
  • Headlights and lighting
  • Engine electrics


VAZ-21213 (1994-2006) 
  • General information
  • Vehicle device
  • User manual
  • Power unit
  • Engine repair
  • Cooling and lubrication system
  • Supply system
  • Transmission
  • Clutch
  • Car gearbox
  • Transfer case
  • Cardan gear
  • Rear axle and shafts
  • Front axle and wheel drive
  • Chassis
  • Wheel suspension
  • Steering
  • Brake system
  • Body
  • Exterior
  • Interior
  • Electrical equipment
  • Engine electrics
  • Equipment and devices


VAZ-21214 (1994-2006) 
  • General information
  • Vehicle information
  • Troubleshooting
  • Power unit
  • Engine repair
  • Cooling system
  • Fuel system (carburetor)
  • Fuel system (injector)
  • Ignition system
  • Control system
  • Exhaust system
  • Transmission
  • Clutch
  • Car gearbox
  • Transfer case
  • Cardan gear
  • Front axle
  • Rear axle
  • Chassis
  • Front suspension
  • Rear suspension
  • Steering
  • Brake system
  • Body
  • Exterior
  • Interior
  • Doors, covers and windows
  • Ventilation and heating
  • Electrical equipment
  • Equipment and devices
  • Headlights and lighting
  • Engine electrics
  • Electrical circuits


VAZbook.ru © 2017 · Mobile version · Contact with administration · Sitemap: EN BG BY UA RS HR RO PL SK HU · Site search · News and articles VAZ-1111 · VAZ-11113 · VAZ-2101 · VAZ-21011 · VAZ-2104 · VAZ-2105 · VAZ-21051 · VAZ-2106 · VAZ-21061 · VAZ-2107 · VAZ-21099 · VAZ-2109 · VAZ-2108 · VAZ-2110 · VAZ-2112 · VAZ-2114 · VAZ-2115 · VAZ-2121 · VAZ-21213 · VAZ-21214 ·
The site stores technical data using cookies to improve the service.