
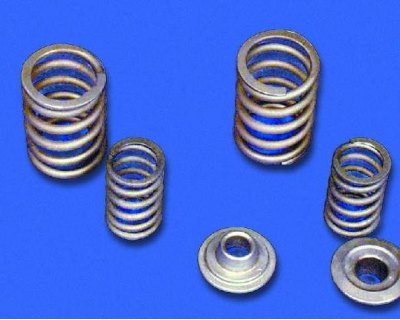
Parameters of valve springs to determine their elasticity.
Outer spring:
free height | 45.2 mm |
height under load 26.0 + 1.7 kgf | 33.7 mm |
height under load 46.2 + 2.4 kgf | 24.7mm |
Internal spring:
free height | 34.1 mm |
height under load 9.0+0.8 kgf | 29.7 mm |
height under load 27.5 + 1.5 kgf | 20.7 mm. |
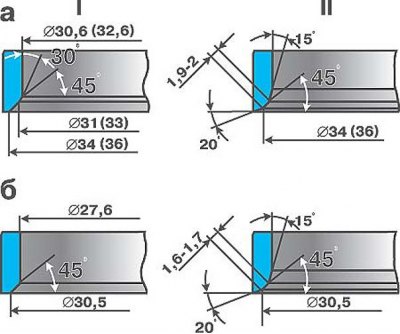
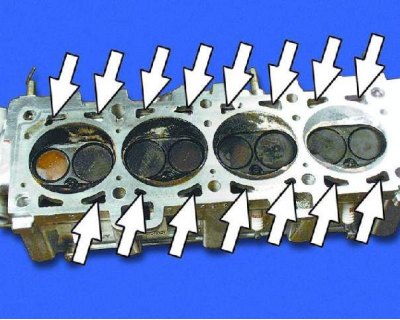
a - intake valve seat
b - exhaust valve seat
I - new seat
II - seat after repair
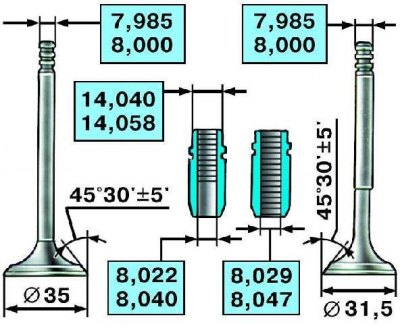
The size of the gaps between the valve and the guide sleeve, mm:
nominal clearance for intake valves | 0,022-0,055 |
nominal clearance for exhaust valves | 0,029-0,062 |
maximum allowable clearance for intake and exhaust valves | 0,3 |
If the clearance is less than the limit, try replacing the valve. If the clearance exceeds the limit, replace the guide bush.
1. Rinse the head parts in gasoline, wipe and dry them.

2. Clean the combustion chambers from soot. Examine the head. If it has cracks or traces of burnout in the combustion chambers, replace the head.
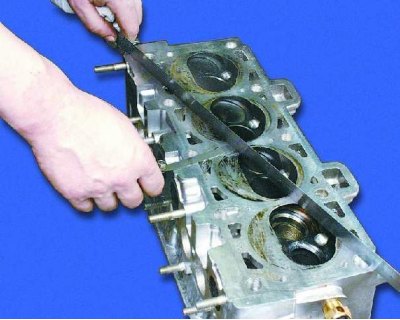
3. Check the flatness of the surface adjacent to the cylinder block. To do this, place a metal ruler with an edge on the surface of the head in the center along, and then diagonally and measure the gap between the plane of the head and the ruler with a feeler gauge. Replace the head if the gap exceeds 0.1mm.
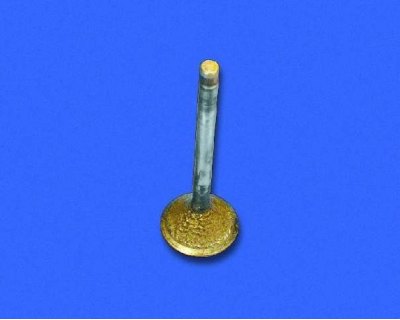
4. Clean carbon deposits from valves. This can be done with a suitable metal tool.
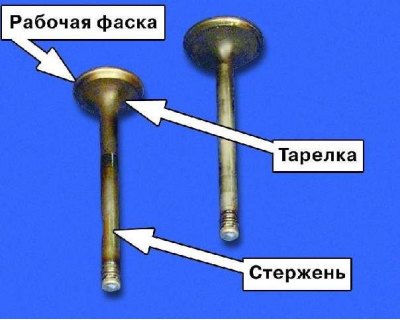
5. Examine the valves. Replace valves with the following defects: deep scratches and scratches on the working chamfer, cracks, deformation of the valve stem, warping of the valve disc, traces of burnout. Shallow risks and scratches on the working chamfer can be removed by lapping the valves.
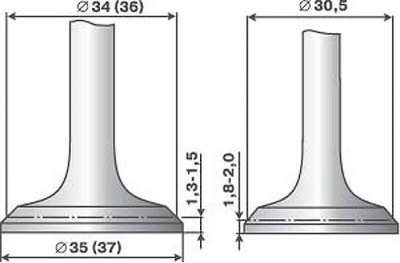
6. Damage to the working chamfer of the valves, which cannot be removed by lapping, can be ground on a special machine. When grinding, it is necessary to maintain the dimensions indicated in the figure. In parentheses are different dimensions for the VAZ-21083 engine (see notes).
7. Check the condition of the valve springs. Replace bent, broken or cracked springs. Check the elasticity of the springs. To do this, measure the height of the springs in the free state, and then under two different loads. If the spring does not meet the required parameters, replace it (see notes).

9. More significant defects in valve seats are eliminated by grinding. When grinding, maintain the dimensions indicated in the figure (see note 1). First, the chamfer is ground at an angle of 20°, then the chamfer at an angle of 45°. After grinding, it is necessary to grind the valves, then thoroughly clean and blow the head of the block with compressed air so that no abrasive particles remain in the channels and combustion chambers. The different dimensions for the VAZ-21083 engine are given in brackets.
10. Check clearance between guide bushings and valves (see note 2). The clearance is calculated as the difference between the diameter of the hole in the sleeve and the diameter of the valve stem.
8. Check the condition of the valve seats. Seat faces must be free of wear, pitting, and corrosion. Minor damage (small risks, scratches, etc.) can be removed by lapping the valves.
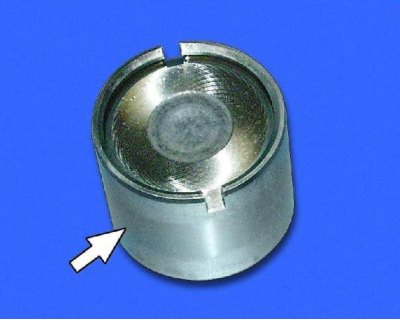
11. Check the valve lifters. If there are scores, scratches or other damage on the working surface of the pusher, replace the pushers.
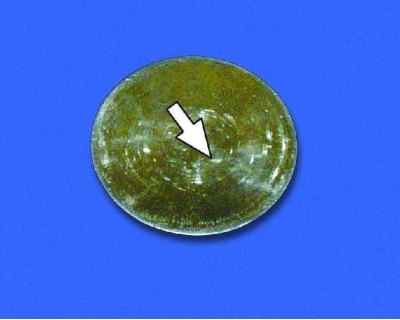
12. Inspect the shims. On their working surfaces there should be no burrs, nicks, scratches, traces of stepped or uneven wear, metal rubbing. With such defects, the washers must be replaced. Concentric burn-in marks with camshaft cams are allowed on the washers.
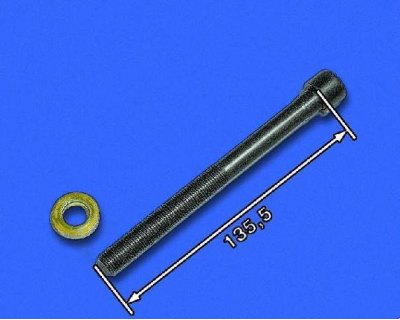
13. Measure the length of the block head bolts, as they stretch out when they are repeatedly tightened. If the bolts are longer than 135.5 mm, replace the bolts.
14. To check the tightness of the head, plug the hole in the pipe of the cooling jacket at the rear end of the head, turn the head over with the combustion chambers up and pour kerosene into the channels of the cooling jacket. If there are kerosene leaks, then the head is not tight and needs to be replaced.