English Русский
Български
Беларускі
Український
Српски
Hrvatski
Română
Polski
Slovenský
Magyar
| Articles | Contacts | Sitemap |   
Repair and maintenance Lada Repair and maintenance Mazda Repair and maintenance Mitsubishi Repair and maintenance Toyota Repair and maintenance Land Rover Repair and maintenance Hyundai Repair and maintenance Nissan
VAZbook.ru


Main     1111   2101   2105   2106   2107   2109   2110   2115   2121  
VAZ-2121 (1977-1994) VAZ-21213 (1994-2006) VAZ-21214 (1994-2006)
  • Main
  • «Niva»
  • VAZ-21214
  • Transmission
  • Car gearbox
  • Disassembly and assembly of the gearbox

Disassembly and assembly of the gearbox (VAZ-21214)

            0

We drain the oil from the gearbox, remove the fork and the clutch release bearing (see relevant sections).

We drain the oil from the gearbox, remove the fork and the clutch release bearing (see relevant…


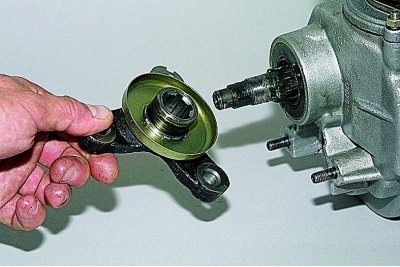
We dismantle the flange of the elastic coupling from the nose of the secondary shaft (see Replacing the secondary shaft seal)…
We dismantle the flange of the elastic coupling from the nose of the secondary shaft (see Replacing…


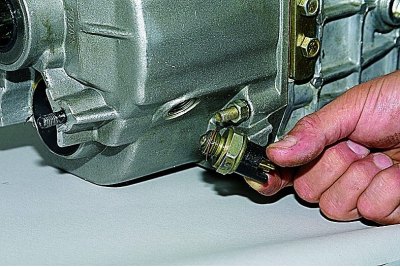
…and the reversing light switch (see Replacing the reverse light switch).

The gear selection mechanism can be dismantled on the vehicle without removing the gearbox. For clarity, these operations are performed on a removed gearbox.
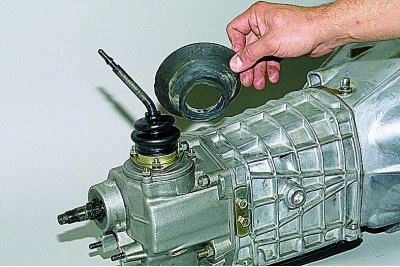
The gear selection mechanism can be dismantled on the vehicle without removing the gearbox. For…


We remove the gear selection mechanism cuff.


We set the gear shift lever to neutral position.
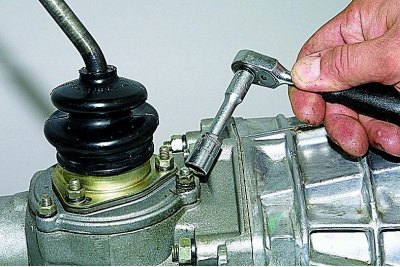
We set the gear shift lever to neutral position.


Using a 10 mm socket, unscrew the three nuts securing the gear shift lever housing…
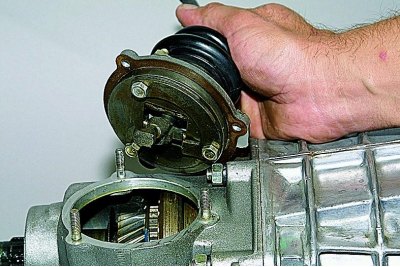
Using a 10 mm socket, unscrew the three nuts securing the gear shift lever housing…


…and we take out the gear selection mechanism.
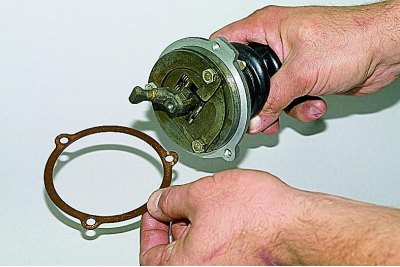
…and we take out the gear selection mechanism.


The connection is sealed with a gasket.
The connection is sealed with a gasket.


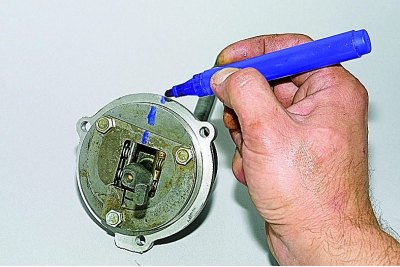
Using a marker, mark the relative positions of the washers and the guide plate of the mechanism.

Using a marker, mark the relative positions of the washers and the guide plate of the mechanism.


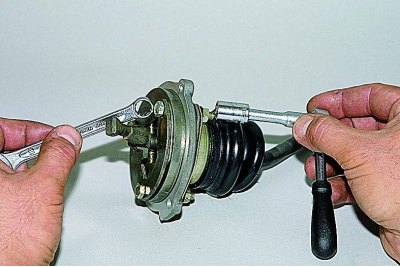
Using a 10 mm socket, unscrew the two nuts securing the reverse gear locking plate, holding the bolts with a wrench of the same size,…
Using a 10 mm socket, unscrew the two nuts securing the reverse gear locking plate, holding the…


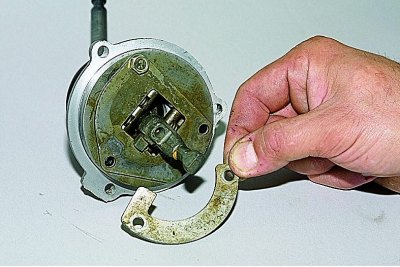
…and remove the locking plate.

After unscrewing one more nut,...
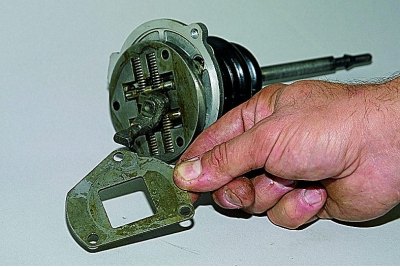
After unscrewing one more nut,...


…remove the lower washer of the guide plate.

By removing one guide bar with two springs,…
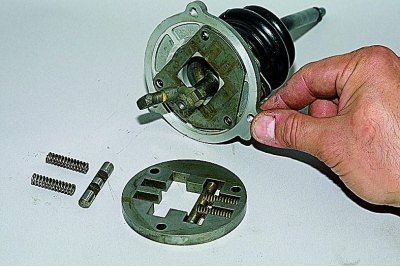
By removing one guide bar with two springs,…


…remove the guide plate from the lower end of the lever.
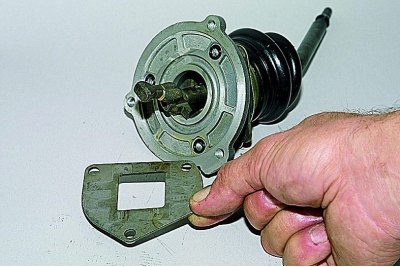
…remove the guide plate from the lower end of the lever.


Remove the upper washer of the guide plate.
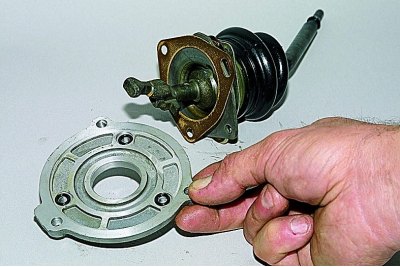
Remove the upper washer of the guide plate.


We remove the gear shift lever housing.
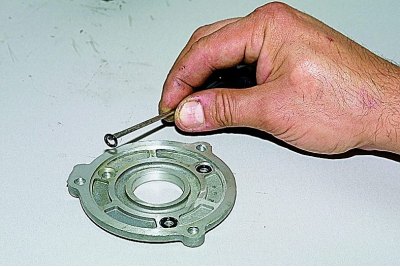
We remove the gear shift lever housing.


We remove the rubber sealing rings of the bolts from the grooves of the housing.
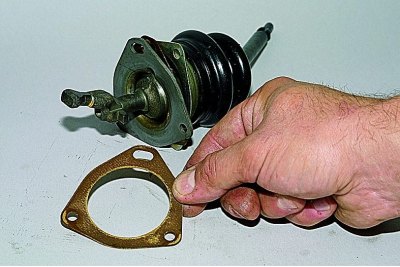
We remove the rubber sealing rings of the bolts from the grooves of the housing.


We remove the lower gasket of the ball joint housing.
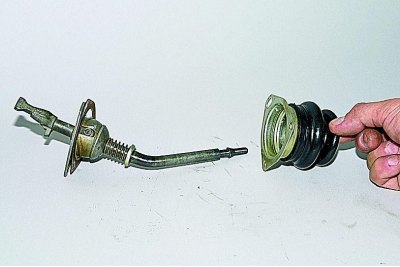
We remove the lower gasket of the ball joint housing.


We remove the flange with the protective cover..
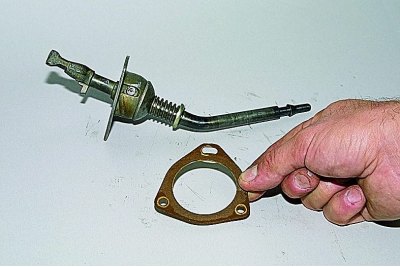
We remove the flange with the protective cover..


…and the upper housing gasket.
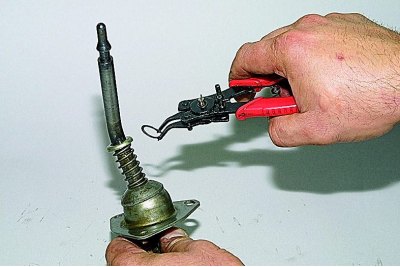
…and the upper housing gasket.


We remove the retaining ring using pliers.
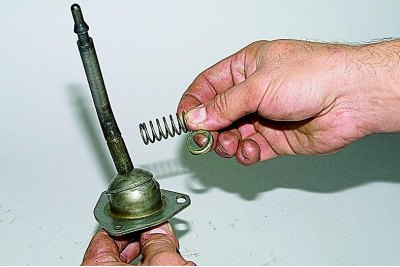
We remove the retaining ring using pliers.


We remove the washer and spring.
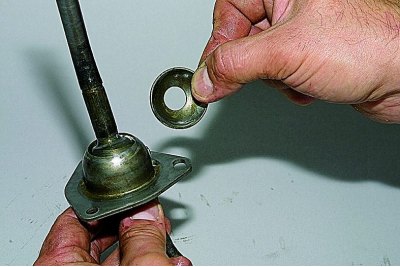
We remove the washer and spring.


We remove the spherical washer..
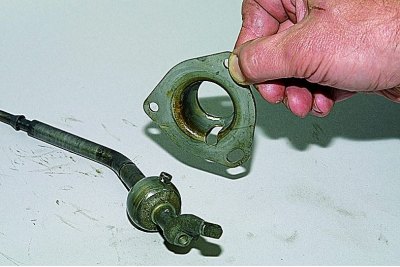
We remove the spherical washer..


…and we separate the lever and the ball joint housing.

We install the gearbox with the clutch housing on the workbench.
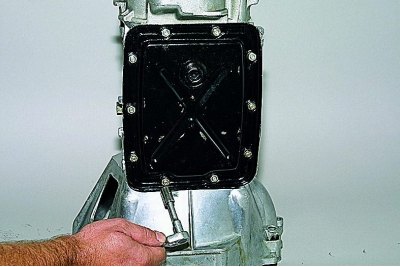
We install the gearbox with the clutch housing on the workbench.


Using a 10 mm socket head, unscrew the ten nuts securing the lower gearbox cover.
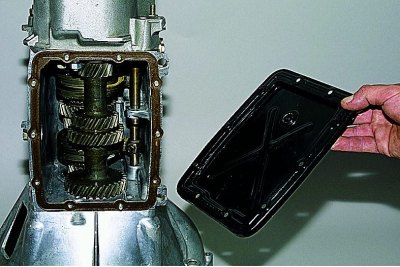
Using a 10 mm socket head, unscrew the ten nuts securing the lower gearbox cover.


We remove the lid..
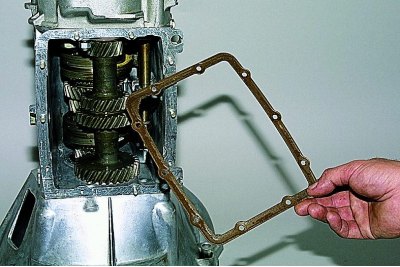
We remove the lid..


…and a sealing gasket.
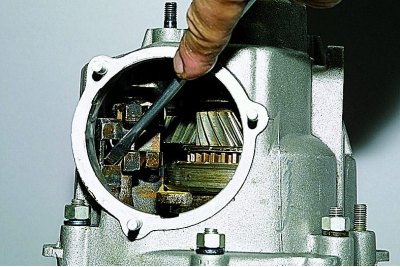
…and a sealing gasket.


Using a screwdriver, move the rod of the fork for engaging I–II gears down through the hole in the gear selection mechanism (in this case, the second gear is engaged).
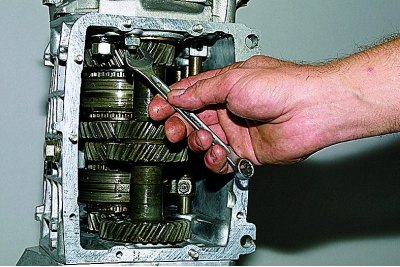
Using a screwdriver, move the rod of the fork for engaging I–II gears down through the hole in the…


Using a 13 mm spanner, unscrew the rear cover mounting nut located inside the gearbox housing.
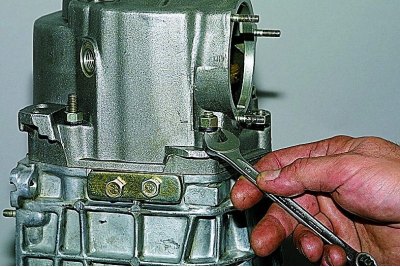
Using a 13 mm spanner, unscrew the rear cover mounting nut located inside the gearbox housing.


Using a 13 mm spanner, unscrew the five nuts securing the rear cover, located on the outside of the case.
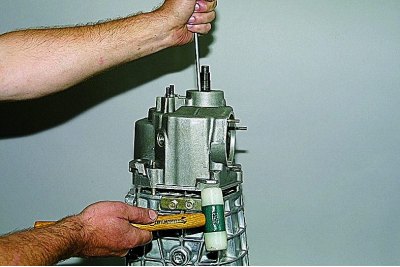
Using a 13 mm spanner, unscrew the five nuts securing the rear cover, located on the outside of the…


We tap the lid lugs with a hammer, while using a screwdriver (or with a suitable piece of pipe with the secondary shaft seal removed) we hold the rear bearing on the secondary shaft.
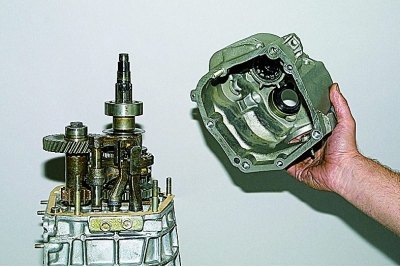
We tap the lid lugs with a hammer, while using a screwdriver (or with a suitable piece of pipe with…


We move the cover off the studs and remove it by turning it clockwise (looking from the secondary shaft tailstock), to prevent the cover from touching the rods and the block of gears of the 5th gear and reverse gear.
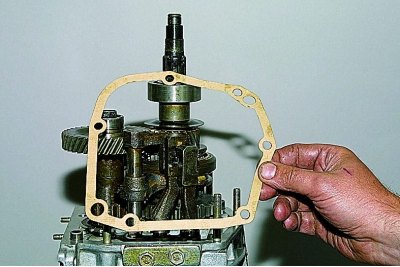
We move the cover off the studs and remove it by turning it clockwise (looking from the secondary…


We remove the cover gasket.

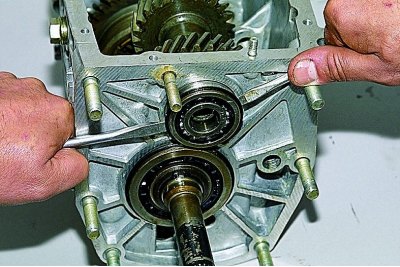
To replace the bearing of the 5th gear and reverse gear block…
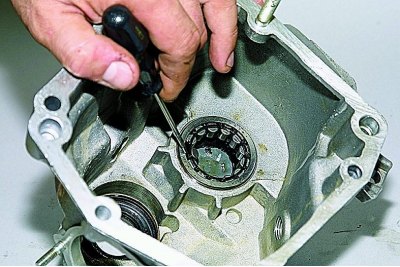
To replace the bearing of the 5th gear and reverse gear block…


…we pry up the bearing rollers with a screwdriver...

... and remove the rollers from the separator.
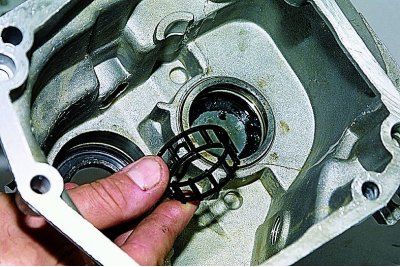
... and remove the rollers from the separator.


We remove the separator.
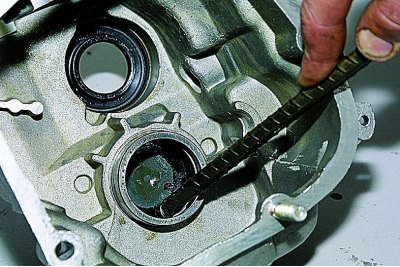
We remove the separator.


By hooking the outer ring of the bearing,…
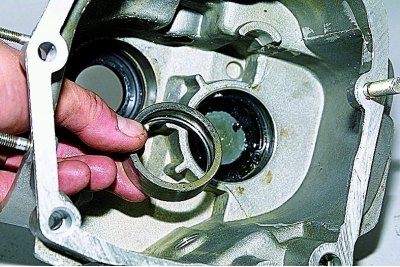
By hooking the outer ring of the bearing,…


…we remove it from the socket on the back cover.
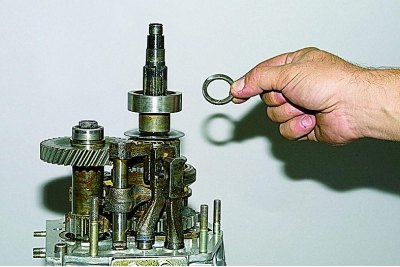
…we remove it from the socket on the back cover.


Remove the thrust ring of the secondary shaft rear bearing.
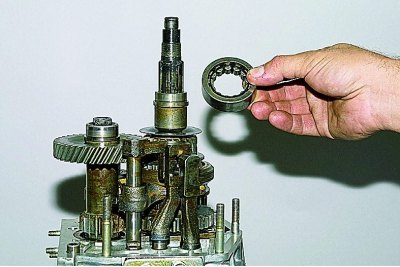
Remove the thrust ring of the secondary shaft rear bearing.


We remove the outer bearing ring with the separator and rollers.
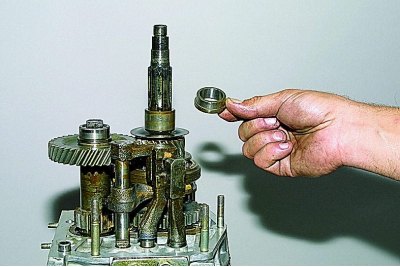
We remove the outer bearing ring with the separator and rollers.


We remove the inner bearing ring.
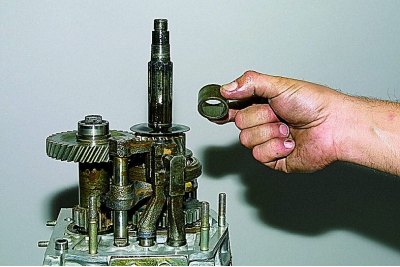
We remove the inner bearing ring.


We remove the spacer sleeve..
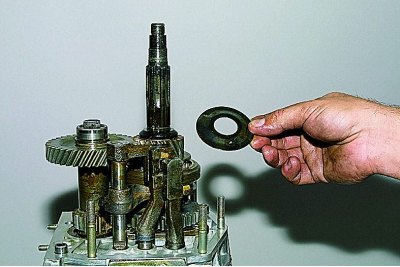
We remove the spacer sleeve..


…and an oil deflector washer.

To lock the shafts from turning, it is necessary to engage two gears. The 2nd gear was engaged when the rear cover was removed. Before engaging the reverse or 5th gear, we release the fork for engaging these gears. To do this…
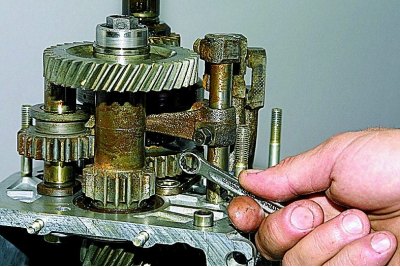
To lock the shafts from turning, it is necessary to engage two gears. The 2nd gear was engaged when…


…using a 10 mm spanner, unscrew the bolt securing the fork to the stem.
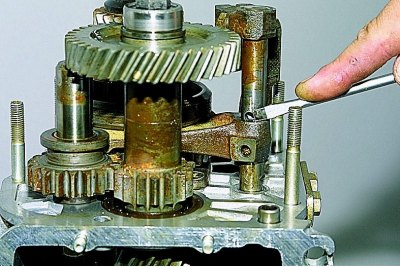
…using a 10 mm spanner, unscrew the bolt securing the fork to the stem.


By pressing the fork down with a screwdriver, we engage reverse gear.
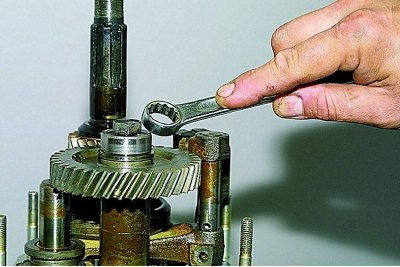
By pressing the fork down with a screwdriver, we engage reverse gear.


Using a 17 mm open-end wrench (head), unscrew the bolt securing the 5th gear and reverse gear block.
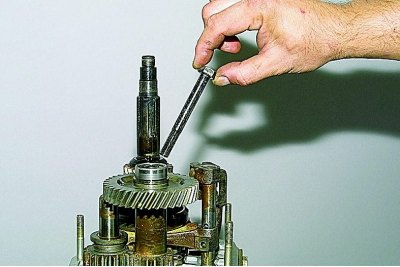
Using a 17 mm open-end wrench (head), unscrew the bolt securing the 5th gear and reverse gear block.


We take out the bolt..
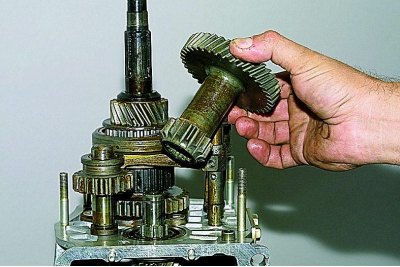
We take out the bolt..


…and remove the gear block from the splines of the intermediate shaft.

We clamp the block of gears of the 5th gear and reverse gear in a vice with soft metal jaw pads.
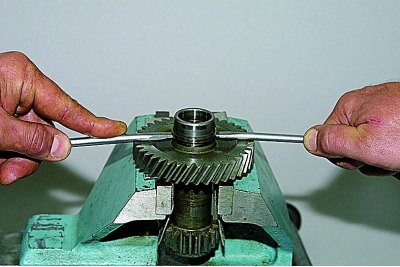
We clamp the block of gears of the 5th gear and reverse gear in a vice with soft metal jaw pads.


Using two screwdrivers, press off the inner ring of the gear block bearing…
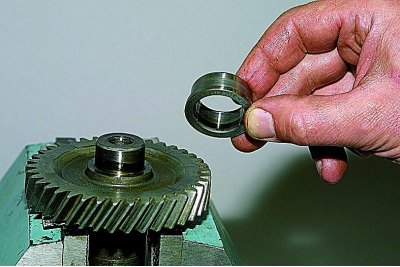
Using two screwdrivers, press off the inner ring of the gear block bearing…


…and remove the inner ring.
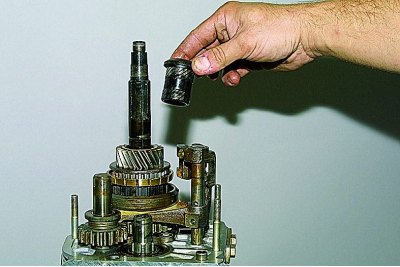
…and remove the inner ring.


We remove the 5th gear bushing,…
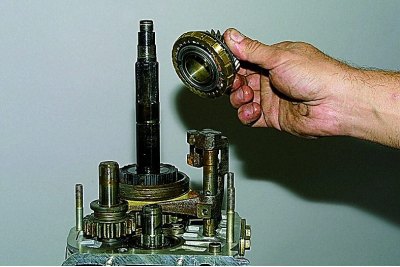
We remove the 5th gear bushing,…


…the gear itself with the synchronizer locking ring,...
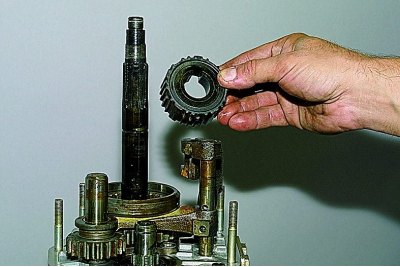
…the gear itself with the synchronizer locking ring,...


…hub…
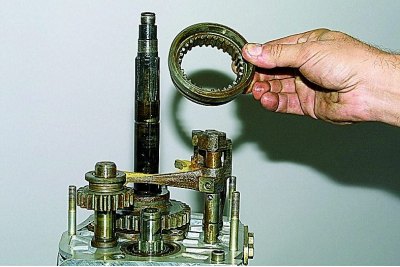
…hub…


…and the synchronizer clutch.

By turning the fork for engaging the 5th gear and reverse gear on the rod towards the secondary shaft,…
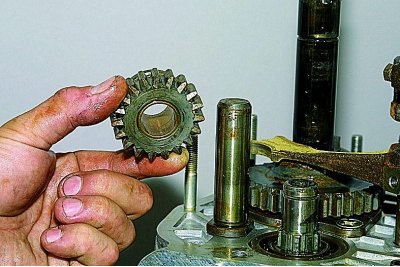
By turning the fork for engaging the 5th gear and reverse gear on the rod towards the secondary…


…we remove the intermediate gear of the reverse gear.
…we remove the intermediate gear of the reverse gear.


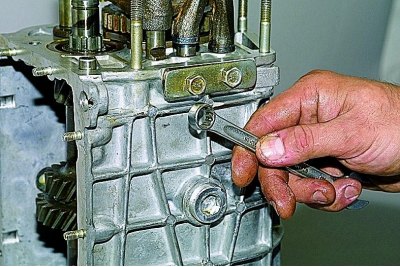
Using a 13 mm open-end wrench, unscrew the two bolts securing the clamp cover.
Using a 13 mm open-end wrench, unscrew the two bolts securing the clamp cover.


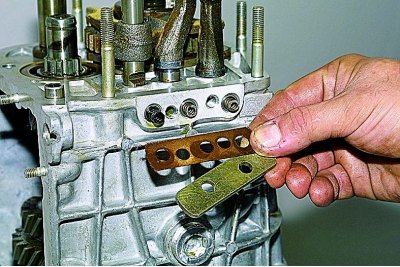
We remove the cover and gasket.
We remove the cover and gasket.


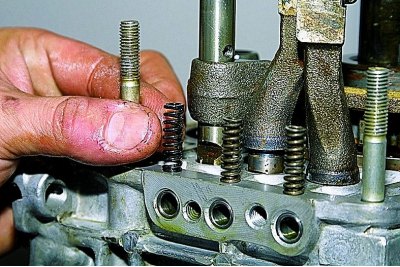
We take out the retainer springs (the spring of the V gear and reverse gear rod is longer than the other two and has a dark color coating).
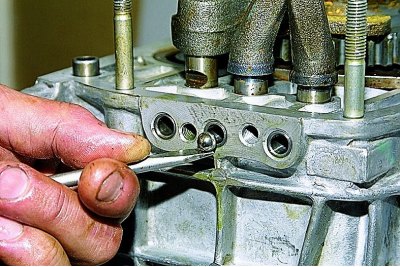
We take out the retainer springs (the spring of the V gear and reverse gear rod is longer than the…


Using a magnetized screwdriver, remove all three fasteners.
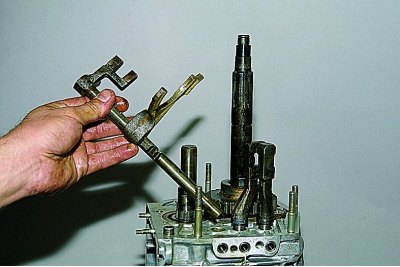
Using a magnetized screwdriver, remove all three fasteners.


We take out the rod for engaging the 5th gear and reverse gear with the fork.
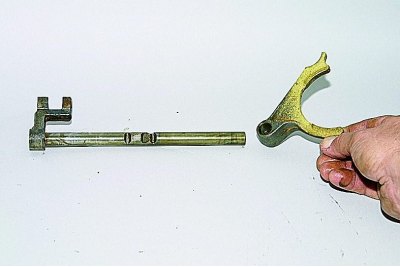
We take out the rod for engaging the 5th gear and reverse gear with the fork.


We remove the fork from the rod.
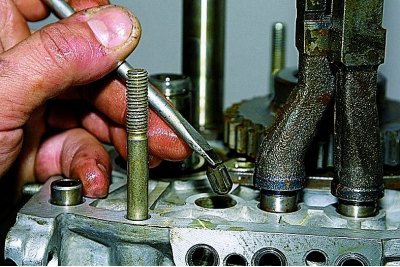
We remove the fork from the rod.


Using a magnetized screwdriver, remove the locking cracker from the hole in the gearbox housing, which is located between the housing sockets for the 5th gear, reverse gear, and 3rd–4th gear rods.
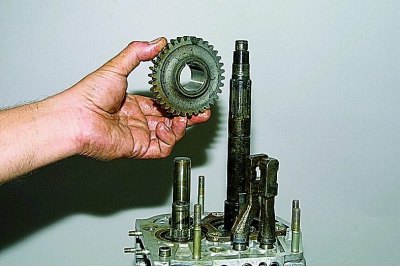
Using a magnetized screwdriver, remove the locking cracker from the hole in the gearbox housing,…


We remove the driven gear of the reverse gear from the secondary shaft.
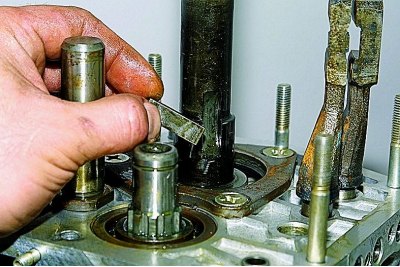
We remove the driven gear of the reverse gear from the secondary shaft.


We remove the key from the shaft groove.
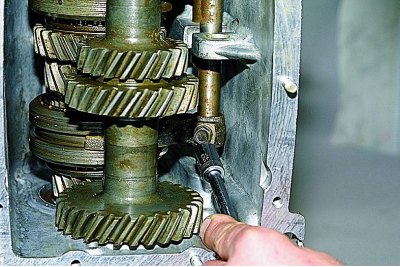
We remove the key from the shaft groove.


Using a 10 mm head, unscrew the bolt securing the III–IV gear fork to the rod.
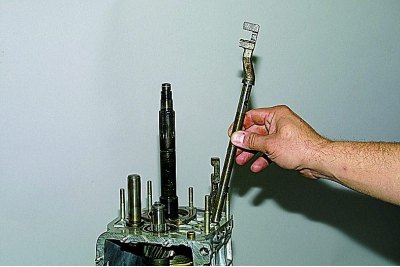
Using a 10 mm head, unscrew the bolt securing the III–IV gear fork to the rod.


We take out the rod.

A locking cracker is inserted into the hole in the rod,…
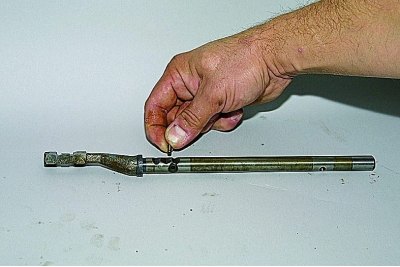
A locking cracker is inserted into the hole in the rod,…


…we take it out.
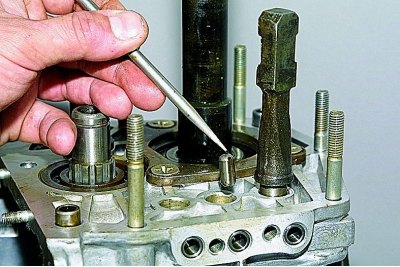
…we take it out.


Using a magnetized screwdriver, remove the locking cracker from the hole in the gearbox housing, which is located between the housing sockets for the I–II and III–IV gear rods (this cracker is noticeably longer than the cracker located between the V gear–reverse gear rod and the III–IV gear rod).
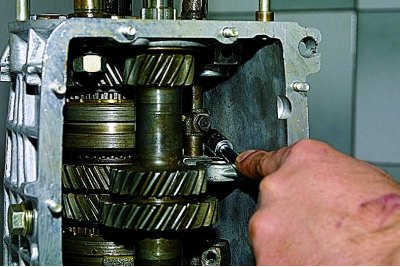
Using a magnetized screwdriver, remove the locking cracker from the hole in the gearbox housing,…


Using a 10 mm socket, unscrew the bolt securing the 1st-2nd gear fork to the rod.
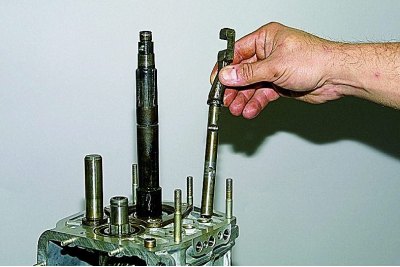
Using a 10 mm socket, unscrew the bolt securing the 1st-2nd gear fork to the rod.


We take out the rod.
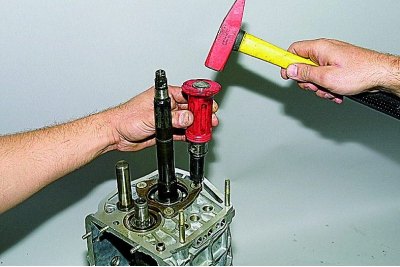
We take out the rod.


Using a Phillips-head impact screwdriver, unscrew the three screws securing the secondary shaft intermediate bearing retaining plate.
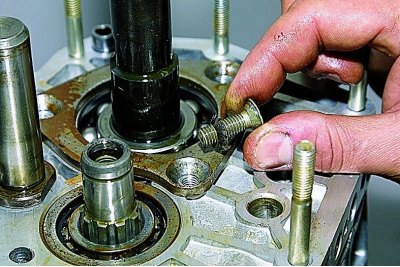
Using a Phillips-head impact screwdriver, unscrew the three screws securing the secondary shaft…


The screws are secured with special washers.
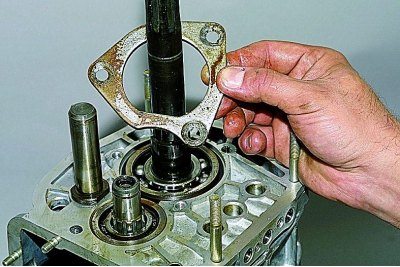
The screws are secured with special washers.


We remove the locking plate.
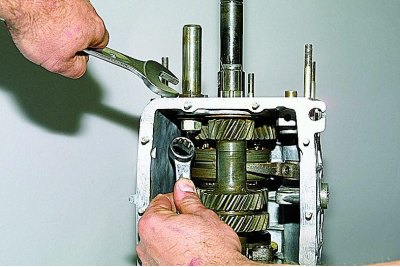
We remove the locking plate.


Using a 19 mm open-end wrench, loosen the nut securing the reverse intermediate gear axle, holding the axle from turning with a 24 mm wrench.
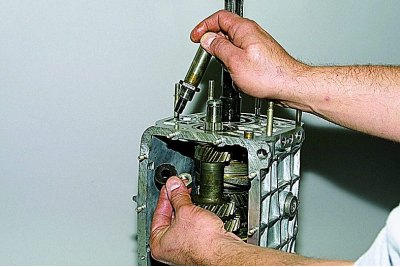
Using a 19 mm open-end wrench, loosen the nut securing the reverse intermediate gear axle, holding…


We take out the axle of the intermediate reverse gear.

After unscrewing the clutch housing mounting nuts (see Replacing the primary shaft seal),...
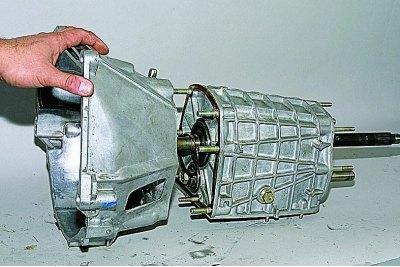
After unscrewing the clutch housing mounting nuts (see Replacing the primary shaft seal),...


…we separate the clutch and gearbox housings.
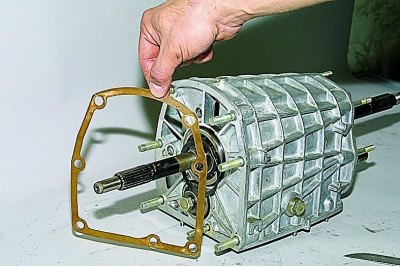
…we separate the clutch and gearbox housings.


We remove the gasket.
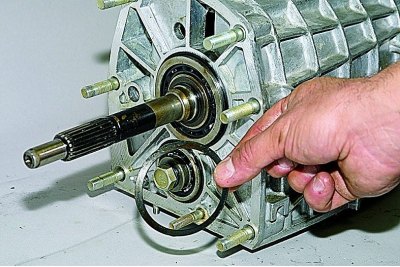
We remove the gasket.


Remove the spring washer with a conical surface from the primary shaft (its smaller diameter faces the bearing).

We clamp the splined part of the primary shaft in a vice with soft metal jaw pads.
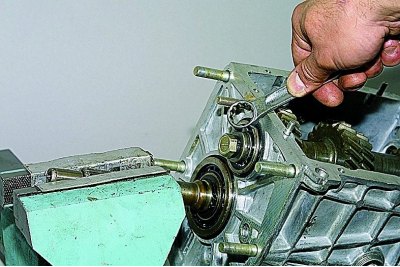
We clamp the splined part of the primary shaft in a vice with soft metal jaw pads.


Using a 19 mm open-end wrench, unscrew the bolt of the clamping washer of the front bearing of the intermediate shaft.
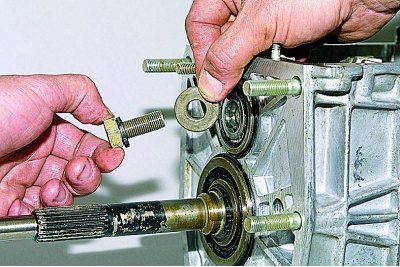
Using a 19 mm open-end wrench, unscrew the bolt of the clamping washer of the front bearing of the…


Remove the bearing clamp washer.

Remove the bearing clamp washer.


Using two screwdrivers, pry up the front double-row bearing of the intermediate shaft by the mounting ring…
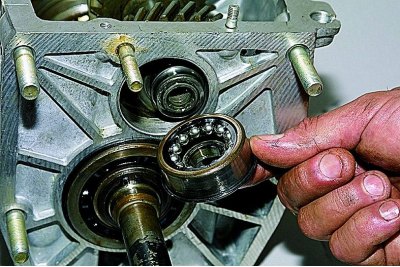
Using two screwdrivers, pry up the front double-row bearing of the intermediate shaft by the…


…and remove the bearing.

When removing a bearing, its rear inner ring may remain on the shaft.
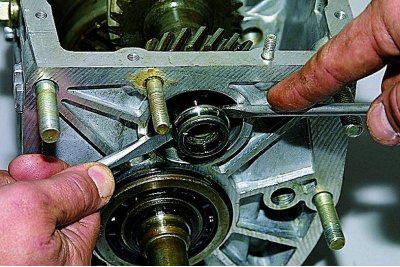
When removing a bearing, its rear inner ring may remain on the shaft.


Using two screwdrivers, press off the rear inner bearing ring…
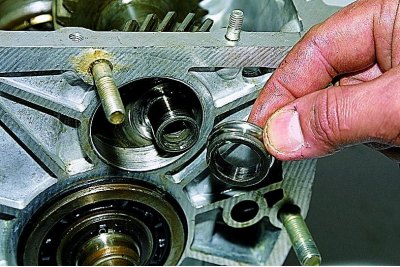
Using two screwdrivers, press off the rear inner bearing ring…


…and we take it off.
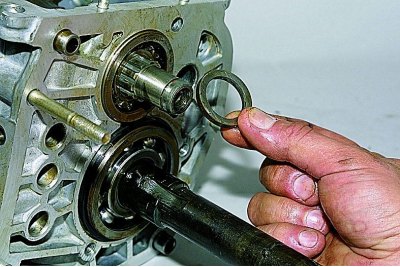
…and we take it off.


We take out the thrust ring of the rear bearing of the intermediate shaft.
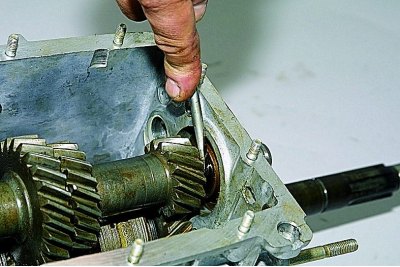
We take out the thrust ring of the rear bearing of the intermediate shaft.


By inserting a screwdriver between the ends of the bearing and the 1st gear of the intermediate shaft, we move the rear bearing.
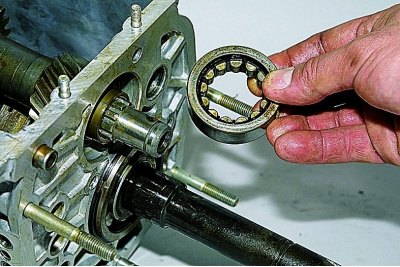
By inserting a screwdriver between the ends of the bearing and the 1st gear of the intermediate…


We take out the outer bearing ring with the separator and rollers.
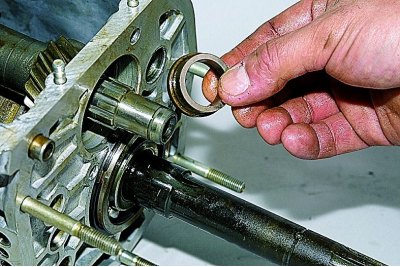
We take out the outer bearing ring with the separator and rollers.


We remove the inner bearing ring from the shaft nose.
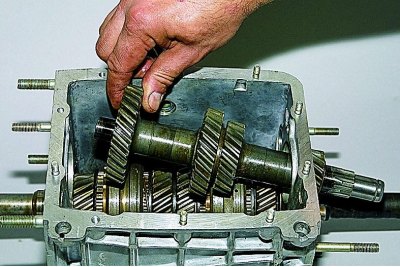
We remove the inner bearing ring from the shaft nose.


By moving the intermediate shaft back,…
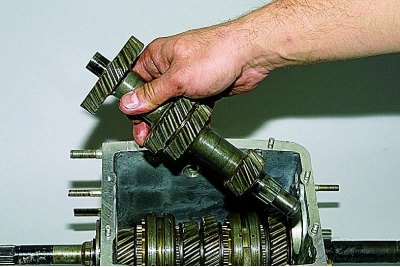
By moving the intermediate shaft back,…


…we remove it from the gearbox housing.
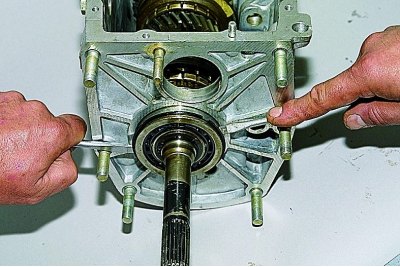
…we remove it from the gearbox housing.


Using two screwdrivers, pry the rear bearing of the primary shaft by the mounting ring,…
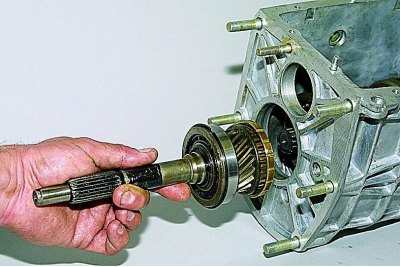
Using two screwdrivers, pry the rear bearing of the primary shaft by the mounting ring,…


…we remove the primary shaft assembly with the bearing and synchronizer locking ring.
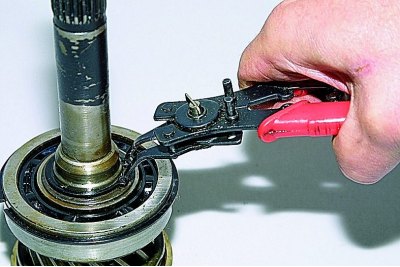
…we remove the primary shaft assembly with the bearing and synchronizer locking ring.


We use pliers to open the retaining ring..
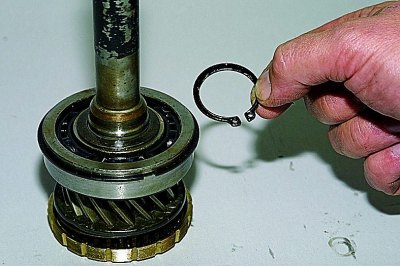
We use pliers to open the retaining ring..


…and we take it off.
…and we take it off.


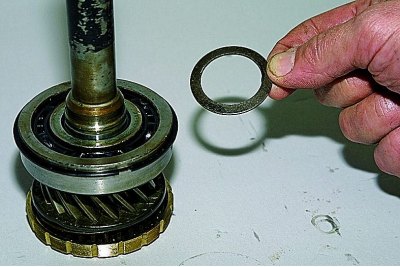
Remove the spring washer.

We rest the end face of the outer bearing ring on the jaws of a vice.
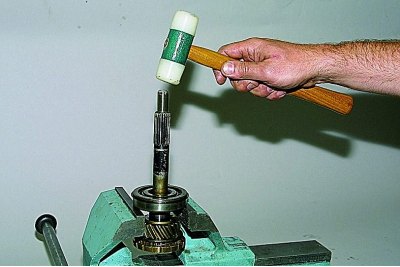
We rest the end face of the outer bearing ring on the jaws of a vice.


Using a hammer with a plastic striker, we strike the end of the primary shaft..
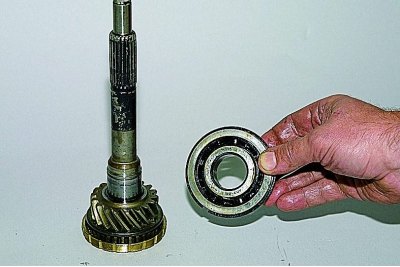
Using a hammer with a plastic striker, we strike the end of the primary shaft..


…and press the bearing.
…and press the bearing.


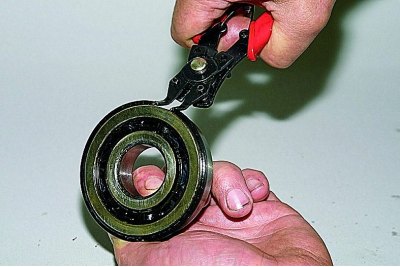
We use pliers to open the mounting ring..
We use pliers to open the mounting ring..


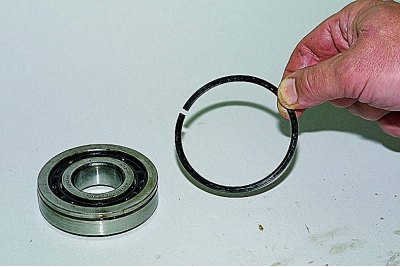
…and we take it off.
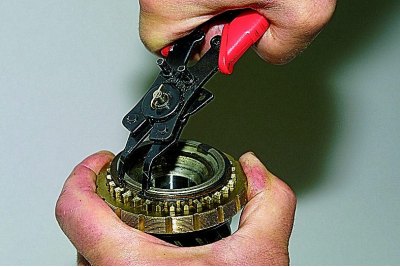
…and we take it off.


Having moved the synchronizer locking ring, we use pliers to open the retaining ring..
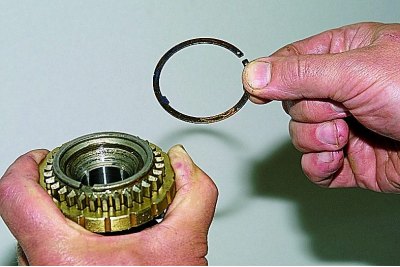
Having moved the synchronizer locking ring, we use pliers to open the retaining ring..


…and we take it off.
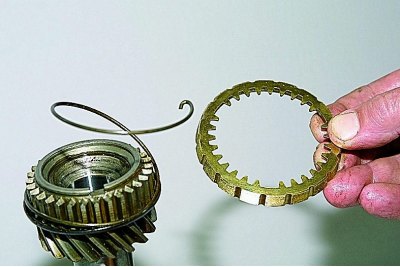
…and we take it off.


We remove the blocking ring..
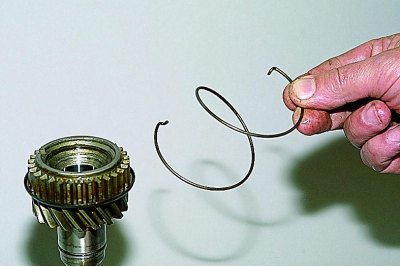
We remove the blocking ring..


…and the synchronizer spring.

The synchronizer locking rings of other gears are removed in a similar manner.
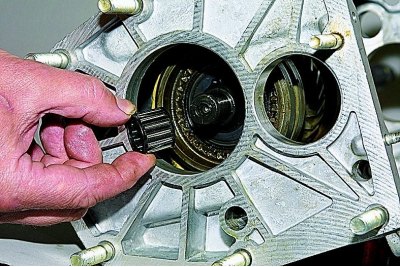
The synchronizer locking rings of other gears are removed in a similar manner.


Remove the needle bearing from the front end of the secondary shaft.
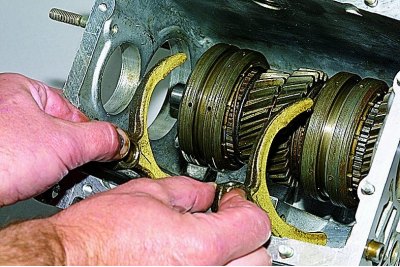
Remove the needle bearing from the front end of the secondary shaft.


We remove the forks for engaging I and II, III and IV gears.
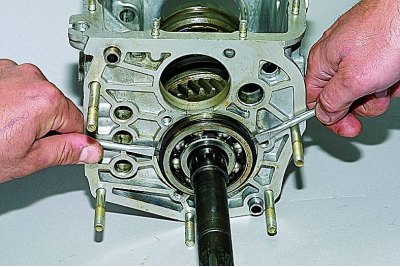
We remove the forks for engaging I and II, III and IV gears.


Using two screwdrivers, pry up the secondary shaft intermediate bearing by the mounting ring…
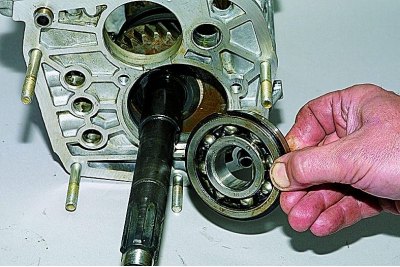
Using two screwdrivers, pry up the secondary shaft intermediate bearing by the mounting ring…


…and we take it off.
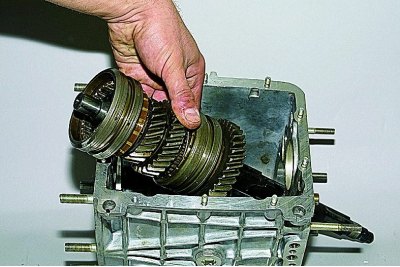
…and we take it off.


By tilting it, we remove the secondary shaft from the gearbox housing, complete with gears, couplings, hubs and synchronizer locking rings.
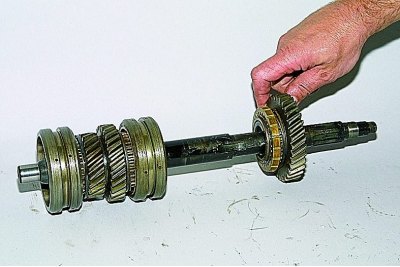
By tilting it, we remove the secondary shaft from the gearbox housing, complete with gears,…


We remove the sleeve and the 1st gear gear assembly with the blocking ring from the rear side of the shaft.
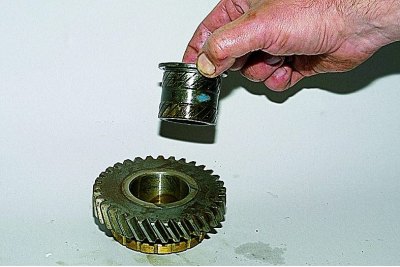
We remove the sleeve and the 1st gear gear assembly with the blocking ring from the rear side of…


We remove the sleeve from the gear.

We remove the sleeve from the gear.


We remove the synchronizer clutch for engaging 1st and 2nd gears.
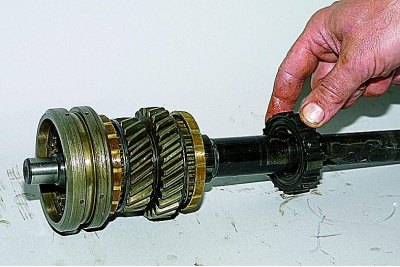
We remove the synchronizer clutch for engaging 1st and 2nd gears.


We remove the synchronizer hub.
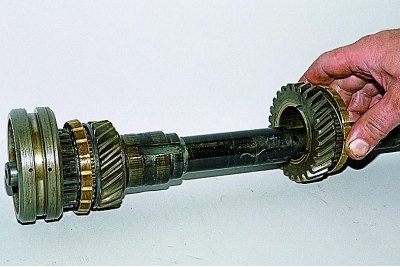
We remove the synchronizer hub.


We remove the 2nd gear gear assembly with the blocking ring.
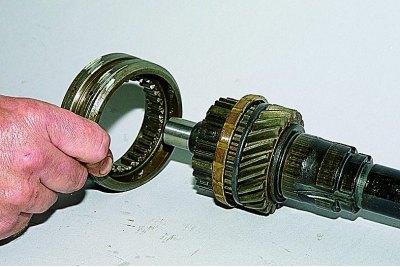
We remove the 2nd gear gear assembly with the blocking ring.


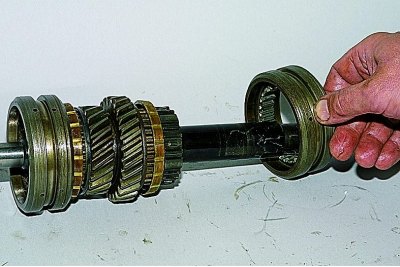
From the front end of the secondary shaft we remove the synchronizer clutch of the III and IV gears.

By clamping the secondary shaft in a vice with soft metal jaw pads,…
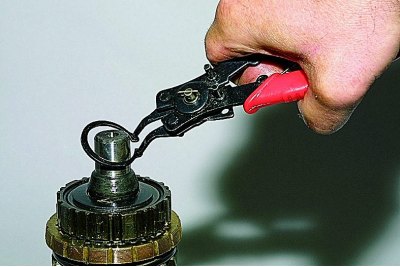
By clamping the secondary shaft in a vice with soft metal jaw pads,…


…we remove the retaining ring using pliers.
…we remove the retaining ring using pliers.


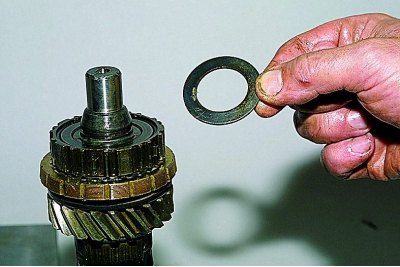
Remove the spring washer (it is installed with its convex side towards the front end of the shaft).
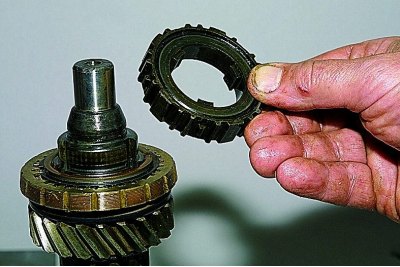
Remove the spring washer (it is installed with its convex side towards the front end of the shaft).


We remove the synchronizer hub of III and IV gears...
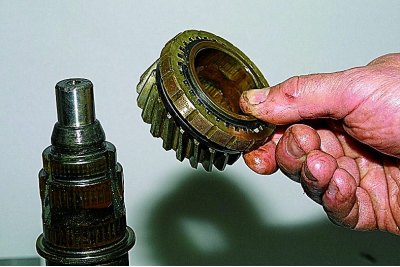
We remove the synchronizer hub of III and IV gears...


…and the third gear assembly with the synchronizer locking ring.

We assemble the gearbox in the reverse order.

If, when removing the front double-row bearing of the intermediate shaft, its rear inner ring remains on the shaft, then the bearing must be assembled before installation. To do this, from the outer ring of the bearing…
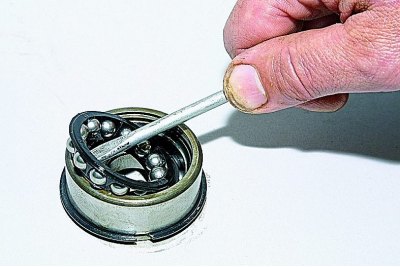
If, when removing the front double-row bearing of the intermediate shaft, its rear inner ring…


…we carefully remove the separator with balls using a screwdriver…
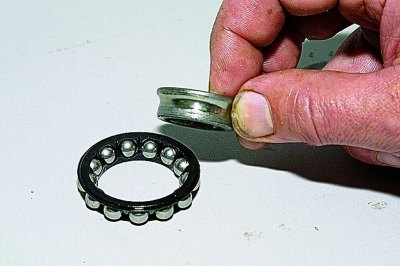
…we carefully remove the separator with balls using a screwdriver…


…and put it on the inner ring (removed from the shaft).
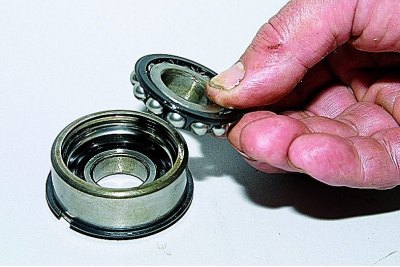
…and put it on the inner ring (removed from the shaft).


We insert the separator with balls and an inner ring into the outer ring of the bearing.

When assembling the primary shaft…
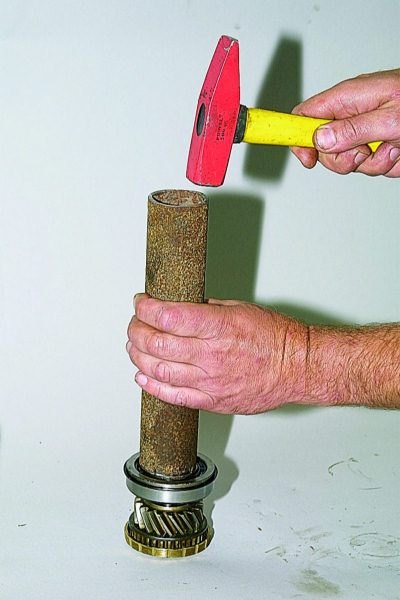
When assembling the primary shaft…


…using a suitable piece of pipe, we press the bearing onto the shaft, resting on its inner ring.

After installing the secondary and intermediate shafts into the gearbox housing, press in the front and rear bearings of the intermediate shaft, the intermediate bearing of the secondary shaft and the inner ring of the bearing of the gear block.

Outer ring of the bearing of the 5th gear and reverse gear block…
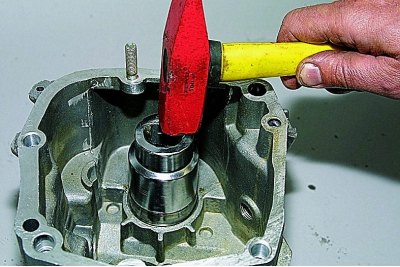
Outer ring of the bearing of the 5th gear and reverse gear block…


…we press it in with a tool head of the appropriate size (with a piece of pipe) into the socket of the back cover.

We insert the separator and rollers into the outer ring of the bearing.

To prevent the 5th gear and reverse gear block mounting bolt from loosening, apply thread sealant to the bolt threads.

For ease of installation of the rear cover, we install the rear bearing assembly on the secondary shaft.

It is advisable to lubricate all sealing gaskets with a thin layer of silicone sealant.

When assembling the gear selection mechanism, apply Litol-24 grease to the ball joint.


This article is available at russian, bulgarian, belarusian, ukrainian, serbian, croatian, romanian, polish, slovak, hungarian
The text was reviewed by the specialist: Grigory Vologodtsev

Share with friends:

Previous articles
VAZ-21214: Car gearbox
Next articles

Removal the front bearing of the gearbox primary shaft
Removal the gearbox
Replacing the secondary shaft seal
Replacing the primary shaft seal
Gearbox oil change
Elements and description of the intermediate shaft
Removal the intermediate shaft
Disassembling the intermediate shaft

More articles from other manuals on VAZ cars:
➠ Gearbox device VAZ-1111 (1988-1996)
➠ Gearbox device VAZ-2101 (1970-1983)
➠ The device of a four-speed gearbox VAZ-2105 (1979-2010)
➠ The device of the four-speed gearbox VAZ-2106 and VAZ-2103 VAZ-2106 (1976-2006)
➠ Description of the gearbox design VAZ-2107 (1982-2012)
Link in different formats to this page


Visitor comments

No comments yet


How much will 43 + 15 ?


VAZ-2121 (1977-1994) 
  • General information
  • Vehicle device
  • Car VAZ-21219
  • Power unit
  • Engine repair
  • Cooling system
  • Lubrication system
  • Supply system
  • Transmission
  • Clutch
  • Car gearbox
  • Transfer case
  • Cardan gear
  • Rear axle and gearbox
  • Front axle
  • Chassis
  • Front suspension
  • Rear suspension
  • Steering
  • Brake system
  • Body
  • Exterior
  • Interior
  • Doors and windows
  • Electrical equipment
  • Equipment and devices
  • Headlights and lighting
  • Engine electrics


VAZ-21213 (1994-2006) 
  • General information
  • Vehicle device
  • User manual
  • Power unit
  • Engine repair
  • Cooling and lubrication system
  • Supply system
  • Transmission
  • Clutch
  • Car gearbox
  • Transfer case
  • Cardan gear
  • Rear axle and shafts
  • Front axle and wheel drive
  • Chassis
  • Wheel suspension
  • Steering
  • Brake system
  • Body
  • Exterior
  • Interior
  • Electrical equipment
  • Engine electrics
  • Equipment and devices


VAZ-21214 (1994-2006) 
  • General information
  • Vehicle information
  • Troubleshooting
  • Power unit
  • Engine repair
  • Cooling system
  • Fuel system (carburetor)
  • Fuel system (injector)
  • Ignition system
  • Control system
  • Exhaust system
  • Transmission
  • Clutch
  • Car gearbox
  • Transfer case
  • Cardan gear
  • Front axle
  • Rear axle
  • Chassis
  • Front suspension
  • Rear suspension
  • Steering
  • Brake system
  • Body
  • Exterior
  • Interior
  • Doors, covers and windows
  • Ventilation and heating
  • Electrical equipment
  • Equipment and devices
  • Headlights and lighting
  • Engine electrics
  • Electrical circuits


VAZbook.ru © 2017 · Mobile version · Contact with administration · Sitemap: EN BG BY UA RS HR RO PL SK HU · Site search · News and articles VAZ-1111 · VAZ-11113 · VAZ-2101 · VAZ-21011 · VAZ-2104 · VAZ-2105 · VAZ-21051 · VAZ-2106 · VAZ-21061 · VAZ-2107 · VAZ-21099 · VAZ-2109 · VAZ-2108 · VAZ-2110 · VAZ-2112 · VAZ-2114 · VAZ-2115 · VAZ-2121 · VAZ-21213 · VAZ-21214 ·
The site stores technical data using cookies to improve the service.