
English Русский
Български
Беларускі
Український
Српски
Hrvatski
Română
Polski
Slovenský
Magyar
| Articles | Contacts | Sitemap |   
Repair and maintenance Lada Repair and maintenance Mazda Repair and maintenance Mitsubishi Repair and maintenance Toyota Repair and maintenance Land Rover Repair and maintenance Hyundai Repair and maintenance Nissan
VAZbook.ru


Main     1111   2101   2105   2106   2107   2109   2110   2115   2121  
VAZ-2110 (1995-2007) VAZ-2112 (1999-2007)
  • Main
  • «Lada»
  • VAZ-2110
  • Power unit
  • Engine repair
  • Removal and installation of a partially disassembled engine

Removal and installation of a partially disassembled engine (VAZ-2110)

            0

Contents: Removal ↓ Installation ↓
To perform the work of removing and installing a partially disassembled engine, you will need:
  • assistant;
  • inspection pit or overpass;
  • height adjustable stop (for example, a screw jack);
  • lifting device (hoist, hoist or winch with a lifting capacity of at least 100 kg) or a second adjustable stop.

Note: If there is no lifting device, the engine can be removed from the car with two assistants. This will require a steel pipe with a diameter of 50-60 mm and a length of 2-2.5 m, as well as a cable.


Removal


1. Prepare the car for work (see 5, p. 2b and 4 "Preparing a car for maintenance and repair").

2. Remove the front right wheel (see p. 2-8 "Wheel - replacement") and place the car on a reliable support.

3. Remove the engine protection (see "Engine protection - removal and installation").

4. Drain the coolant (see items 3-7 "Replacing the coolant").

5. Drain the oil from the engine (see items 2-7 "Oil and oil filter change").

6. Remove the oil pan (see items 4-6 "Engine Oil Pan - Removal").

7. Remove the oil receiver (see p. 2-3 "Oil receiver - removal").

8. Remove the cylinder head (see "Cylinder head - removal").

9. Remove the generator (see "Generator - removal and installation").

10. Remove the oil pump (see "Oil pump - disassembly, assembly and installation").

11. Remove the coolant pump (see "Coolant pump - removal and installation").

12. Disconnect the wiring harness connector from the knock sensor (see "Knock sensor (DS) - check").

13. Disconnect the front engine mount rod from the front suspension crossmember (see "Powertrain supports and rods - removal and installation").


14. Using a 17 mm socket wrench, unscrew the three bolts securing the lower generator bracket.
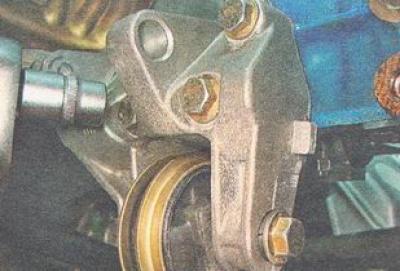
14. Using a 17 mm socket wrench, unscrew the three bolts securing the lower generator bracket.


15. Remove the bracket together with the rod.
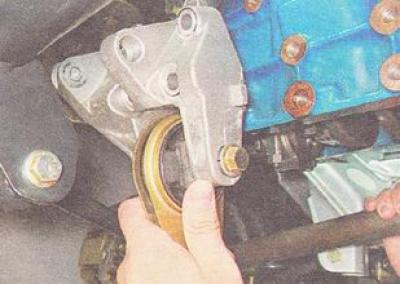
15. Remove the bracket together with the rod.


16. After loosening the clamp, remove the crankcase ventilation hose from the cylinder block pipe.
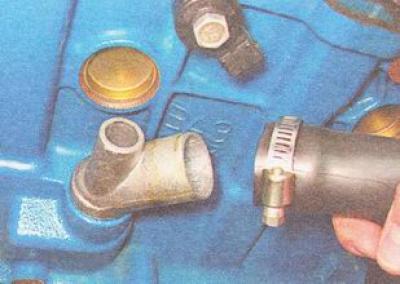
16. After loosening the clamp, remove the crankcase ventilation hose from the cylinder block pipe.


17. Using a 10 mm wrench, unscrew the two bolts securing the supply pipe to the cylinder block.
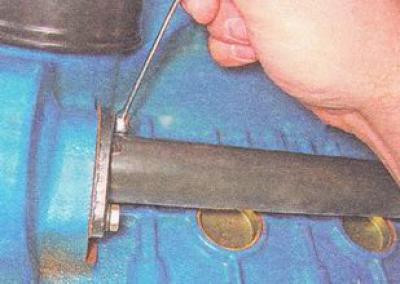

17. Using a 10 mm wrench, unscrew the two bolts securing the supply pipe to the cylinder block.


18. Disconnect the supply pipe from the block.
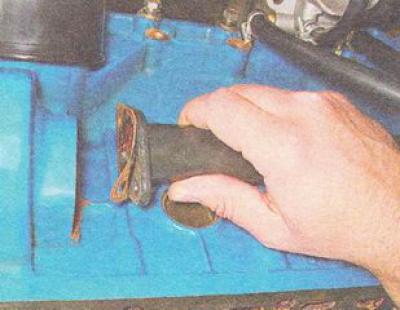
18. Disconnect the supply pipe from the block.


Note: The connection is sealed with a gasket.


19. Unscrew and remove the oil filter (see "Oil and oil filter change").

20. Remove the starter (see "Starter - removal and installation").

21. Install an adjustable stop under the gearbox and hang the cylinder block on a lifting device or install an adjustable stop under the cylinder block. Slightly lift the cylinder block, relieving the right support of the power unit.

22. Unscrew the bolts securing the gearbox to the unit (see point 18 "Gearbox - removal and installation").

23. Unscrew the upper bolt nut of the right support cushion (see point 4 "Powertrain supports and rods - removal and installation").

24. Using a 13 mm socket wrench, unscrew the three bolts securing the right engine support bracket to the cylinder block.
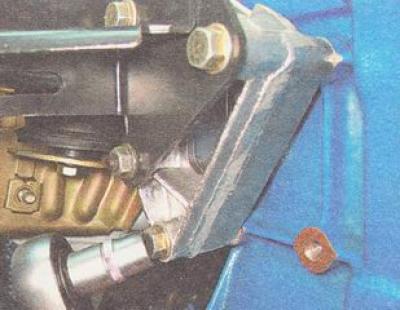
24. Using a 13 mm socket wrench, unscrew the three bolts securing the right engine support bracket…


25. Remove the engine support bracket together with the upper generator mounting bracket.
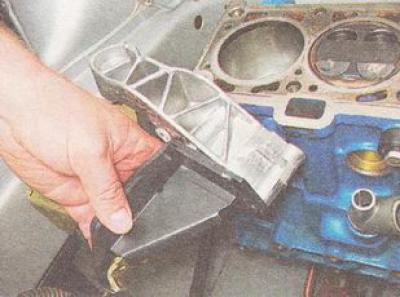
25. Remove the engine support bracket together with the upper generator mounting bracket.


26. Using a 15 mm socket wrench, unscrew the three bolts securing the support bracket to the right side member under the right front wing of the car.
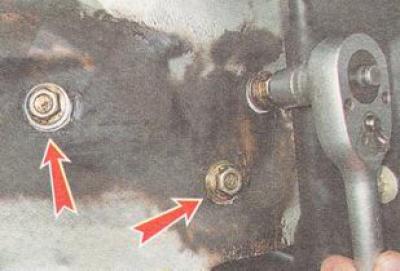
26. Using a 15 mm socket wrench, unscrew the three bolts securing the support bracket to the right…


27. Remove the bracket together with the right engine support.
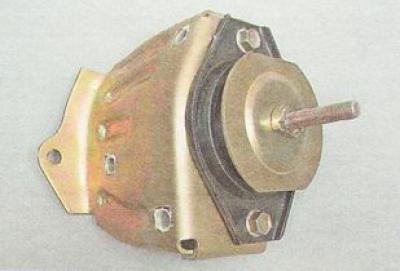
27. Remove the bracket together with the right engine support.


28. Slightly rocking the cylinder block, we disconnect it from the gearbox and remove it from the engine compartment.
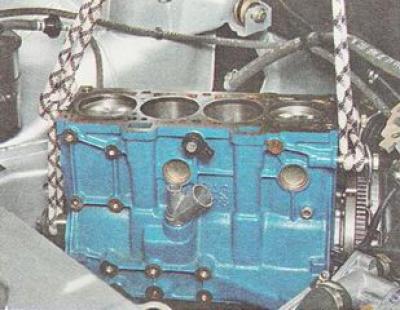
28. Slightly rocking the cylinder block, we disconnect it from the gearbox and remove it from the…


Installation


We install the cylinder block and all removed parts on the car in the reverse order of removal, after which we install the removed units and assemblies on it.


This article is available at russian, bulgarian, belarusian, ukrainian, serbian, croatian, romanian, polish, slovak, hungarian
The text was reviewed by the specialist: Grigory Vologodtsev

Share with friends:

Previous articles
VAZ-2110: Engine repair
Next articles

Removal and installation the engine assembly
Engine Mounts and Rods — Removal and Installation
Piston and connecting rod — replacement
Piston rings — replacement
Oil pump — removal, disassembly, assembly and installation
Engine repair with complete disassembly

More articles from other manuals on VAZ cars:
➠ The structure of a car engine VAZ-1111 (1988-1996)
➠ General structure of a car engine VAZ-2101 (1970-1983)
➠ The engine structure of VAZ-2104 and VAZ-2105 cars VAZ-2105 (1979-2010)
➠ The engine structure of VAZ-2106 and VAZ-2103 cars VAZ-2106 (1976-2006)
➠ Engine hood VAZ-2107 (1982-2012)
Link in different formats to this page


Visitor comments

No comments yet


How much will 12 + 28 ?


VAZ-2110 (1995-2007) 
  • General information
  • Vehicle description
  • Specifications
  • User manual
  • Maintenance
  • Operation and maintenance
  • Tips for car owner
  • Power unit
  • Engine repair
  • Supply system
  • Control system
  • Cooling system
  • Exhaust system
  • Transmission
  • Clutch
  • Car gearbox
  • Front wheel drives
  • Chassis
  • Suspension and wheels
  • Steering
  • Brake system
  • Body
  • Exterior
  • Interior
  • Doors and glass
  • Tailgate
  • Ventilation and heating
  • Electrical equipment
  • Equipment and devices
  • Headlights and lighting
  • Engine electrics
  • Electrical circuits


VAZ-2112 (1999-2007) 
  • General information
  • Operation and maintenance
  • Power unit
  • Engine repair
  • Supply system
  • Control system
  • Cooling system
  • Exhaust system
  • Transmission
  • Clutch
  • Car gearbox
  • Front wheel drives
  • Chassis
  • Wheels and tires
  • Car suspension
  • Steering
  • Brake system
  • Body
  • Exterior
  • Interior
  • Doors and glass
  • Tailgate
  • Ventilation and heating
  • Electrical equipment
  • Equipment and devices
  • Headlights and lighting
  • Engine electrics
  • Electrical circuits


VAZbook.ru © 2017 · Mobile version · Contact with administration · Sitemap: EN BG BY UA RS HR RO PL SK HU · Site search · News and articles VAZ-1111 · VAZ-11113 · VAZ-2101 · VAZ-21011 · VAZ-2104 · VAZ-2105 · VAZ-21051 · VAZ-2106 · VAZ-21061 · VAZ-2107 · VAZ-21099 · VAZ-2109 · VAZ-2108 · VAZ-2110 · VAZ-2112 · VAZ-2114 · VAZ-2115 · VAZ-2121 · VAZ-21213 · VAZ-21214 ·
The site stores technical data using cookies to improve the service.