




Contents: Removal ↓ Installation ↓
Note. To remove the engine from the vehicle, you will need a lifting device with a minimum lifting capacity of 200 kg. If you do not have such a device, the engine can be partially disassembled in the engine compartment, leaving only the cylinder block assembled with the connecting rod and piston group, flywheel and clutch. The partially disassembled engine can be removed by hand with helpers or using a block.
The need to remove a partially disassembled engine may arise when, during the repair of an engine installed in the engine compartment, it becomes necessary to bore the cylinder block.
To complete the work you will need:
- assistant;
- inspection pit or overpass;
- lifting device (hoist, hoist or winch with a lifting capacity of at least 200 kg).
Note: If the design of the lifting device does not allow you to move the raised engine outside the car, you can roll the car itself. To do this, you will need two bolts (M16-M20) with washers and nuts. They will need to compress the front wheel hub bearings.
Removal
1. Prepare the car for work (see points 1, 26 and 4 "Preparing a car for maintenance and repair").
2. Remove the hood from the car (see points 1-5 "Hood - removal, installation and adjustment").
3. Relieve the pressure in the fuel line (see "Fuel line - pressure relief").
4. Remove the battery (see "Battery - Removal and Installation").
5. Remove the decorative engine cover (see "Decorative engine cover - removal and installation").
6. Remove the air filter housing (see "Air filter - removal and installation").
7. Disconnect the throttle cable from the engine (see p. 3-7 "Throttle - Drive Cable Replacement").
8. Disconnect the wire connector from the throttle position sensor (see "Throttle Position Sensor (TPS) - Checking and Replacing").
9. Disconnect the wire connector from the idle speed controller (see points 2 and 3 "Idle speed control (ISC) - checking and replacement").
10. Disconnect the vacuum booster hose from the intake module / receiver (see point 8 "Engine intake module 21124 (1.6i) - removal, installation, replacement" / "Engine receiver 2112 (1.5i) - removal and installation", p. 5)
11. On the VAZ 2112 engine (l,5i), disconnect the wiring harness connector from the ignition module (see point 4 "Ignition module VAZ 2112 (1.5i) - check").
On the VAZ 21124 engine (l,6i), disconnect the wire connectors from the four ignition coils (see paragraphs 3 and 4 "Ignition coils VAZ 21124 (1.6i) - check and replacement").
12. Disconnect the wire connector from the camshaft position sensor (see point 2 "Camshaft Position Sensor (CPS) - Replacement").
13. Disconnect the wire connector from the crankshaft position sensor (see point 2 "Crankshaft Position Sensor (CPS) - Replacement").
14. Disconnect the wire connector from the adsorber purge valve (see point 2 "Evaporative Canister Purge Valve - Checking and Replacing").
15. Disconnect the connectors of the nozzle wiring harness (see point 8 "Fuel rail 2112 (1.5i) - removal, disassembly, assembly and installation").
16. On the VAZ 2112 (l,5i) engine, disconnect the wire connector from the oil level sensor in the oil pan.
17. Disconnect the wire connectors from the engine management system coolant temperature sensors and the temperature gauge.
18. Disconnect the wire connector from the knock sensor.
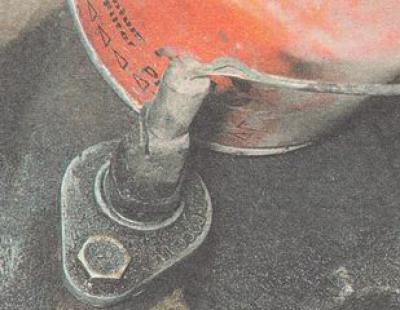
19. Disconnect the tips of the "mass" wires and the tip of the negative battery output wire from the engine (see point 9 "Cylinder head - removal and installation").
20. Disconnect the wire connector from the emergency oil pressure sensor (see point 2 "Engine Oil Pressure Sensor - Replacement").
21. Disconnect the fuel lines from the engine (see point 6 "Fuel rail VAZ 21124 (1.6i) - replacement", on the VAZ 21124 engine there is no fuel drain line).
22. Remove the generator (see "Generator - removal and installation").
23. Drain the liquid from the engine cooling system (see items 3-6 "Replacing the coolant").
24. Drain the oil from the engine (see items 2-6 "Oil and oil filter change") and gearboxes (see p. 2-5 "Gearbox - Oil change").
25. Disconnect the engine cooling system hoses from the thermostat pipes
26. On the VAZ 2112 engine (1.5i), remove the intake pipe (see "Engine inlet pipe - removal and installation").
On the VAZ 21124 engine (l,6i) we remove the catalytic collector (see "Catalytic converter manifold - removal, installation, replacement").
27. Remove the gearbox (see "Gearbox - removal and installation").
28. Using M16 bolts, nuts and washers, tighten the front wheel hub bearings.
29. Tighten one of the gearbox mounting bolts (with a wide washer put on it) into the upper threaded hole of the cylinder block on the left side. We tie a cable to it to lift the engine.
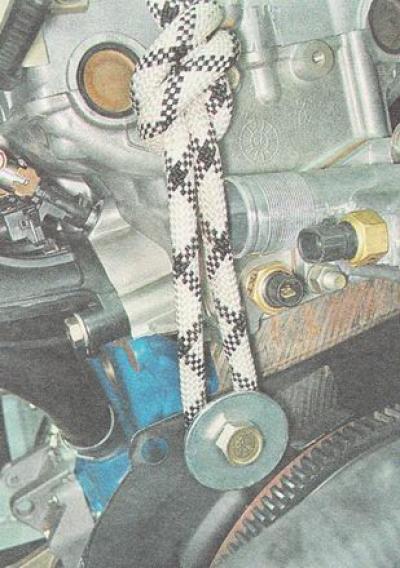
We tie the other end of the cable to the mounting eye fixed to the cylinder head and hang the engine on the winch.
30. Remove both power unit mounting rods.
31. Unscrew the upper nut of the bolt of the cushion of the right support of the power unit (see "Powertrain supports and rods - removal and installation").
Warning: The following operation must be performed with an assistant who must control the position of the engine during lifting and ensure that nothing in the engine compartment is damaged.
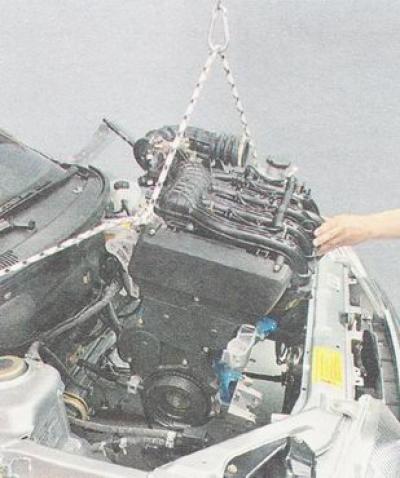
32. Using a winch, lift the engine and remove it from the engine compartment.
Installation
We install the engine and all removed parts on the car in the reverse order of removal.