




To complete the work you will need a bore gauge.
Sequence of execution
1. Prepare the car for work (see "Preparing the car for maintenance and repair").
2. Remove the pistons from the cylinder block (see "Piston rings and connecting rod bearings - replacement").
Note: For information on how to use the bore gauge, see the enclosed instructions or special literature.
3. Using a bore gauge, check the wear of the cylinder walls.
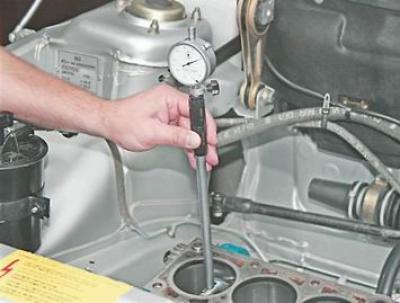
We take measurements in four zones (5, 12, 62 and 112 mm from the top edge of the cylinder) in the longitudinal and transverse directions of the engine. The cylinder does not wear out in the upper belt. Based on the difference in bore gauge readings in different belts, we determine the degree of wear of each cylinder.
Engine cylinder diameters are divided into five size classes (see table 8.4). The class of each cylinder is stamped on the lower mating surface of the cylinder block.
Table 8.4. Cylinder classes by diameter
|
Designation |
Diameter, mm |
|
A |
82,00-82,01 |
|
B |
82,01-82,02 |
|
C |
82,02-82,03 |
|
D |
82,03-82,04 |
|
E |
82,04-82,05 |
Recommendation: Slight uniform wear of the cylinder (within 0.05 mm) can be compensated by installing a piston of a different class with a larger diameter.
If the maximum wear is 0.15 mm or more, the cylinders need to be bored and pistons of a repair size installed.
It is possible to bore cylinders by 0.4 mm and 0.8 mm to suit the dimensions of repair pistons.
4. The designations on the piston bottom indicate where:
- 2nd class piston pin hole;
- C class piston;
- ← mark that should be directed towards the front end of the crankshaft;
- G piston mass group.
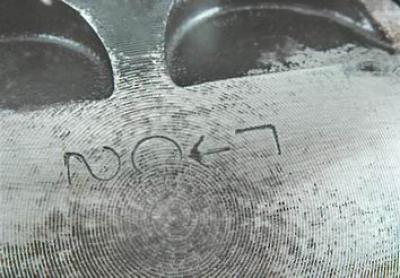
According to the diameter of the hole for the piston pin, pistons are divided into three classes (1, 2, 3) through 0.004 mm.
According to the outer diameter, pistons are divided into five classes (A, B, C, D, E) through 0.01 mm (measured in a plane perpendicular to the piston pin, at a distance of 55 mm from the piston bottom).
According to size, pistons are nominal and of two repair sizes. Nominal size pistons are not marked. Pistons of the first repair size are manufactured with a diameter increased by 0.4 mm and are marked with the symbol "Δ". Pistons of the second repair size have a diameter increased by 0.8 mm and are marked with the symbol "□".
All pistons on the engine must be of the same weight group. Pistons of the nominal group are designated by the symbol "G". Pistons with increased and decreased weight by 5 g are designated "+" and "-" respectively.
The finger class is marked with paint on its end.
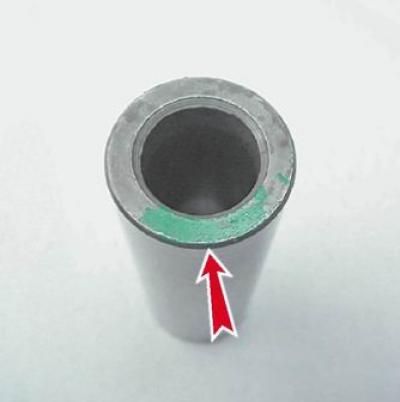
According to the outer diameter, the fingers are divided into three classes (blue, green and red), through 0.004 mm.
To facilitate the selection of the pin for the piston hole, the required pin class is indicated on its inner side with paint.
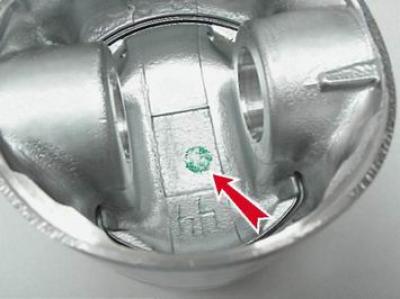
The required pin class is indicated on the connecting rod cap (number 2). Connecting rods are divided into classes by head weight. The marking is applied to the connecting rod cap with the letter "M"...
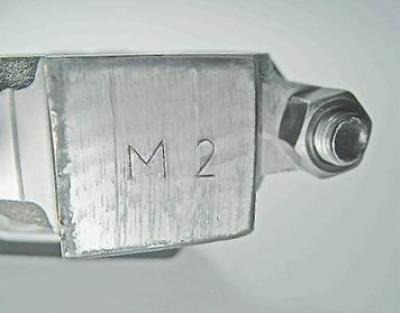
...or paint.
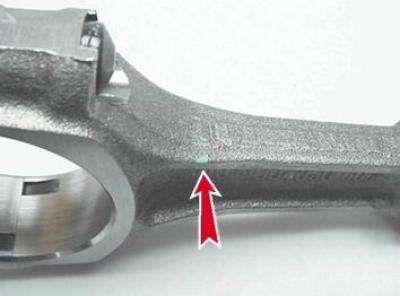
The engine must be equipped with connecting rods of the same weight class (see table 8.5).
Table 8.5. Connecting rod classes by weight
|
Mass of connecting rod heads, g |
Class |
Color of marking |
|
|
Top |
Lower |
||
|
184+2 |
489+3 |
F |
Red |
|
495+3 |
L |
Green |
|
|
501+3 |
B |
No |
|
|
188+2 |
489+3 |
X |
No |
|
495+3 |
M |
No |
|
|
501+3 |
IN |
No |
|
|
192+2 |
489+3 |
c |
No |
|
495+3 |
n |
No |
|
|
501+3 |
g |
Blue |
|
Warning! On 2111 engines, the connecting rod and piston group parts with a floating pin are not interchangeable with the connecting rod and piston group parts with a pressed-in pin. Either of the two connecting rod and piston groups can be installed in the same cylinder block. Using a connecting rod and piston group with a floating pin is preferable.